Account Admins
Account Admin Video
Required Reading
Please read the Architecture Guide before starting this training. It is a 5-minute read that will give you a strong foundation of how PagerTree is organized and how alerts flow through the system.
Users, Roles, and Permissions
Account admins are the only users within your account who can add users and teams, which are the backbone of the PagerTree on-call system.
Inviting Users
-
Navigate to the Users page.
-
Click the New User Button in the top right corner.
-6da432faf79568fe4374b8cc05d5870b.png)
Create User Button
-
Follow the instructions on the New User form:
- Name - Full Name (Required).
- Email - Work Email (Required).
- Roles - Roles this user should have in this PagerTree account.
- Team - Team this user should be a member of.
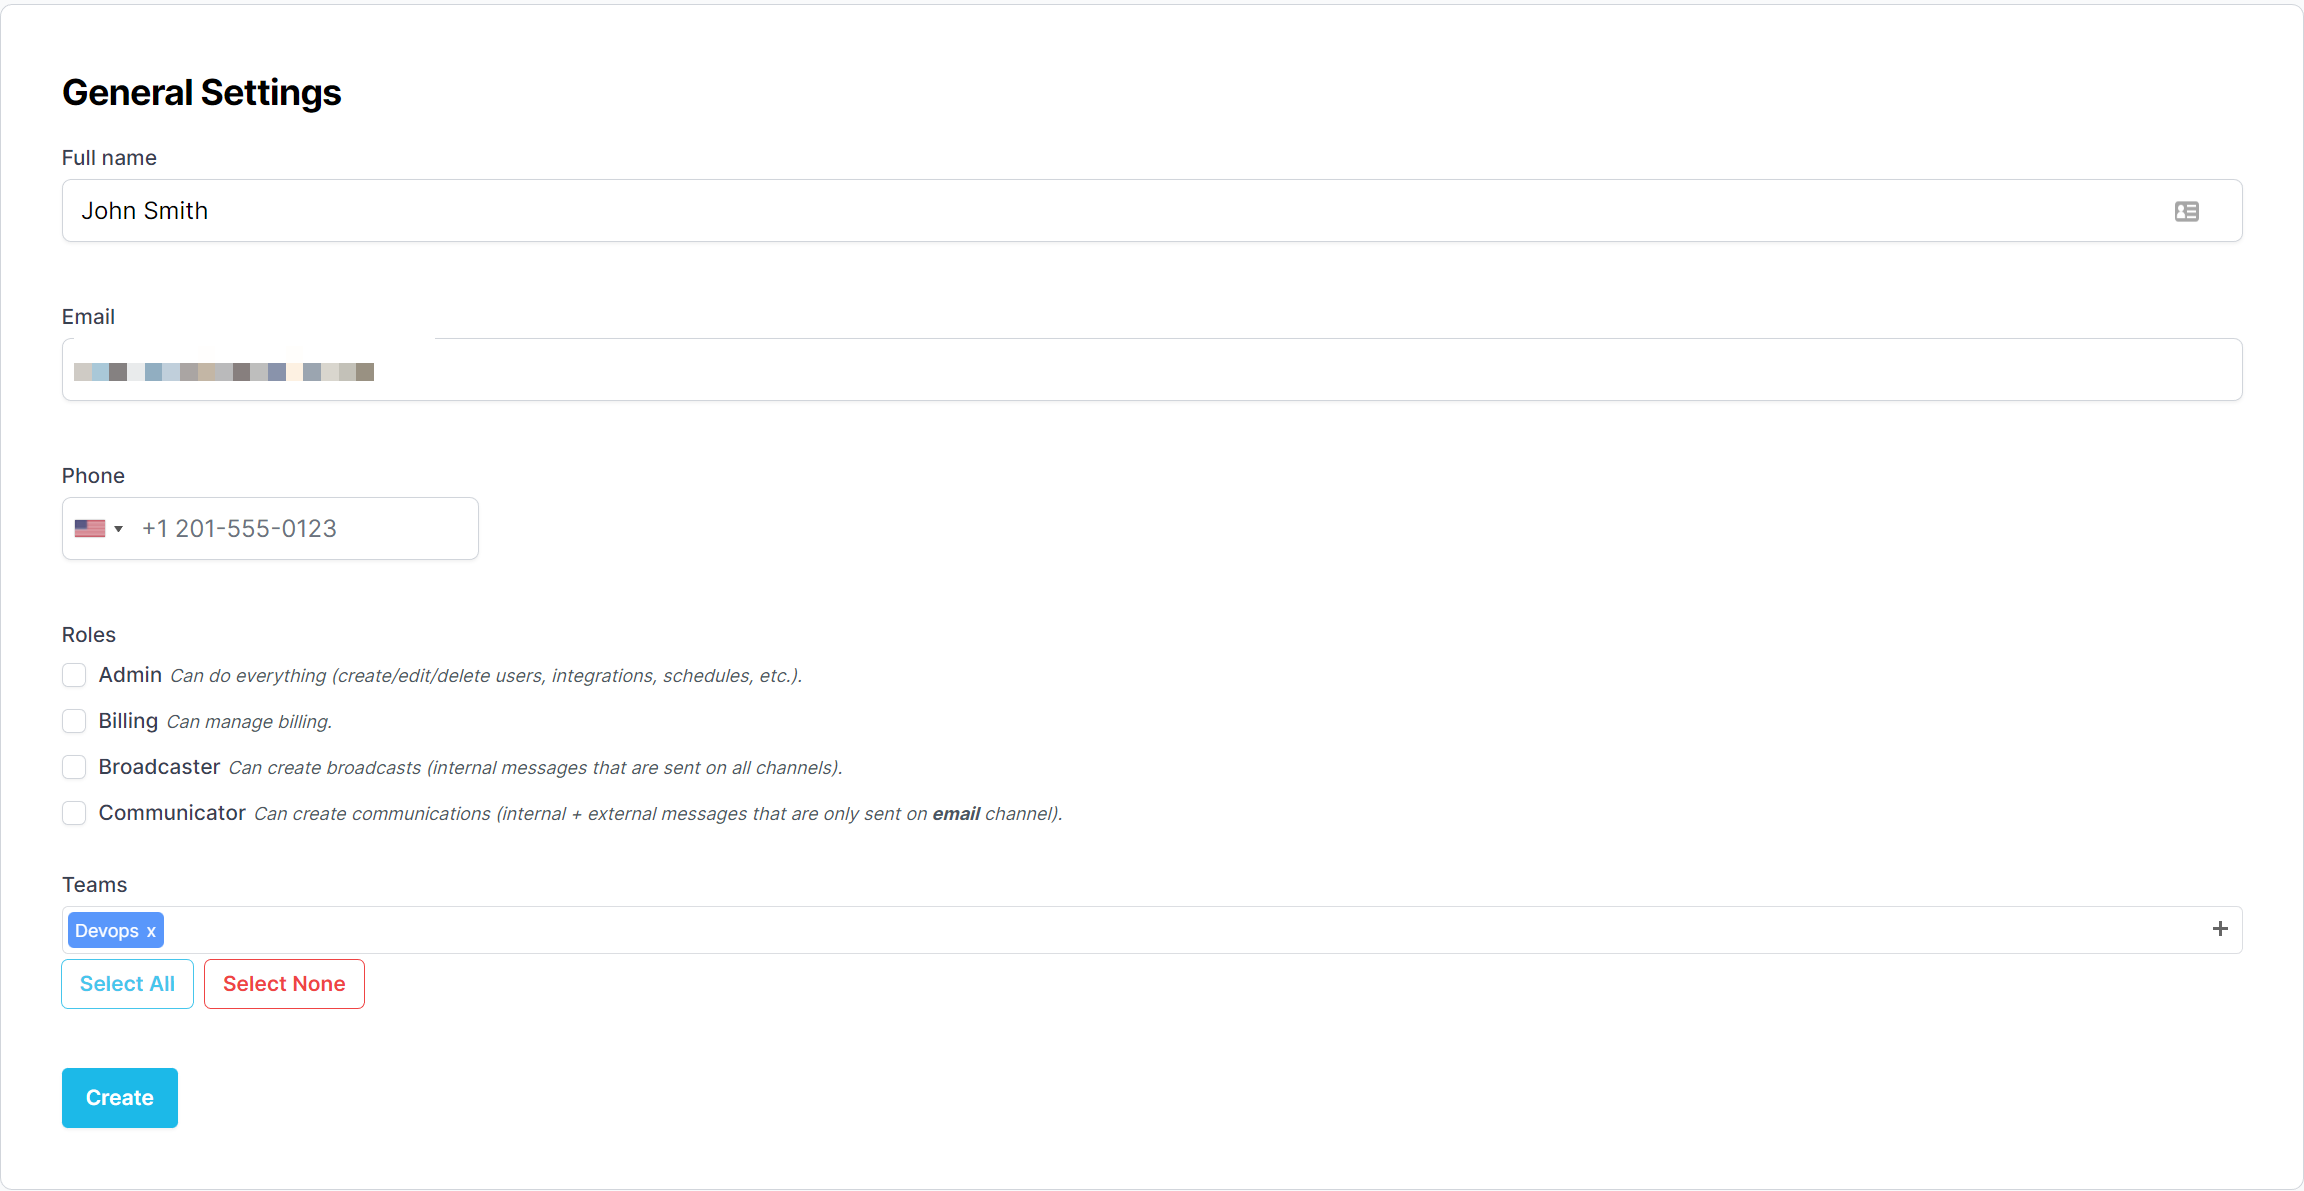
Create User Form
- Click the Create Button.
If successful, you should be directed to the newly created user page. A notice at the top of the page will inform you either:
- Created - The user was successfully created.
- Invited - The user was successfully invited (this user is already part of another PagerTree account).
In each case, the created or invited user will receive an email with directions on how to log in.
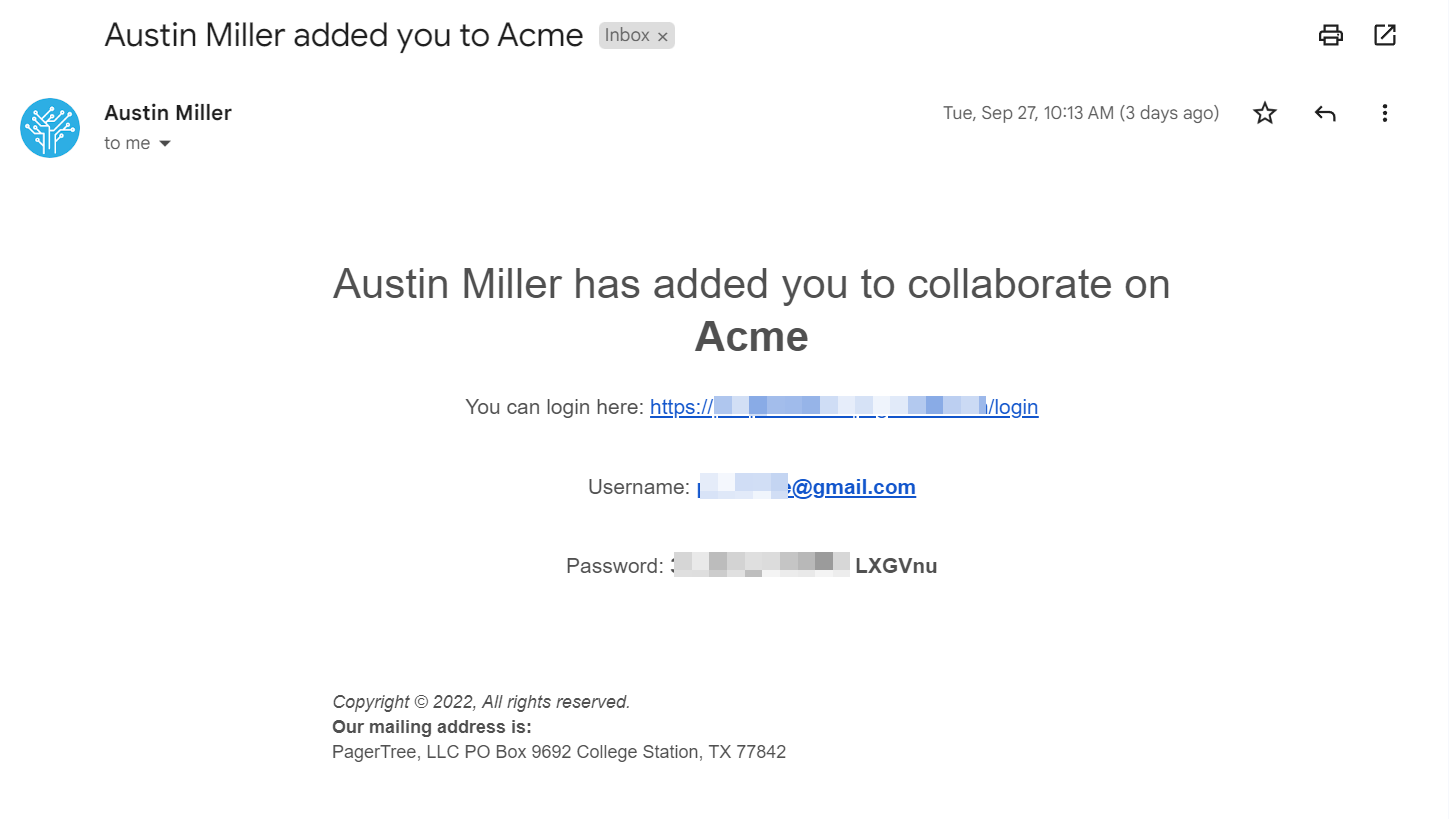
User Invite Email
Roles and Permissions
Giving users roles and permissions allows them to perform special tasks within PagerTree.
There are 4 global roles in PagerTree:
- Admin - Admins manage any object except billing.
- Billing - Can manage the Account's PagerTree subscription.
- Broadcaster - Has the special ability to manage Broadcasts.
- Communicator - Has the special ability to create Stakeholder communications.
There are 2 roles for a PagerTree team:
- Team admin - Can manage the team, team members, team admins, on-call schedules, and escalation policy.
- Team member - No special permissions.
Integrations
Integrations connect PagerTree to 3rd party applications and are responsible for transforming 3rd party webhook data into alerts. All integrations are open source.
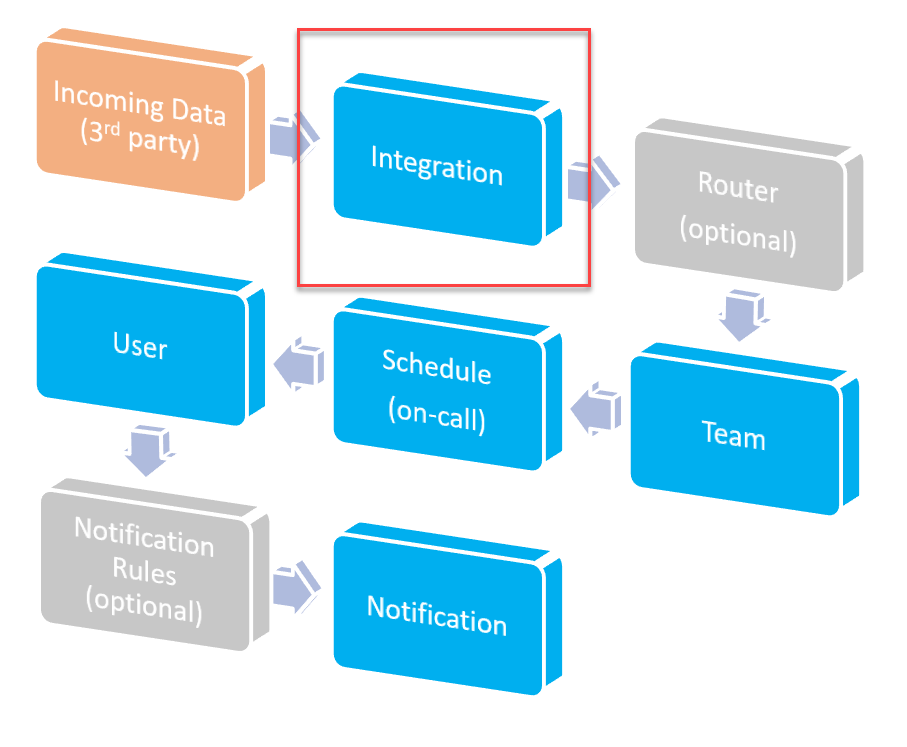
Alert Workflow (Integrations)
Create an Integration
- Navigate to the integrations page.
- Click the New Integration Button.

New Integration Button
- Click on the Logo of the tool you wish to integrate.
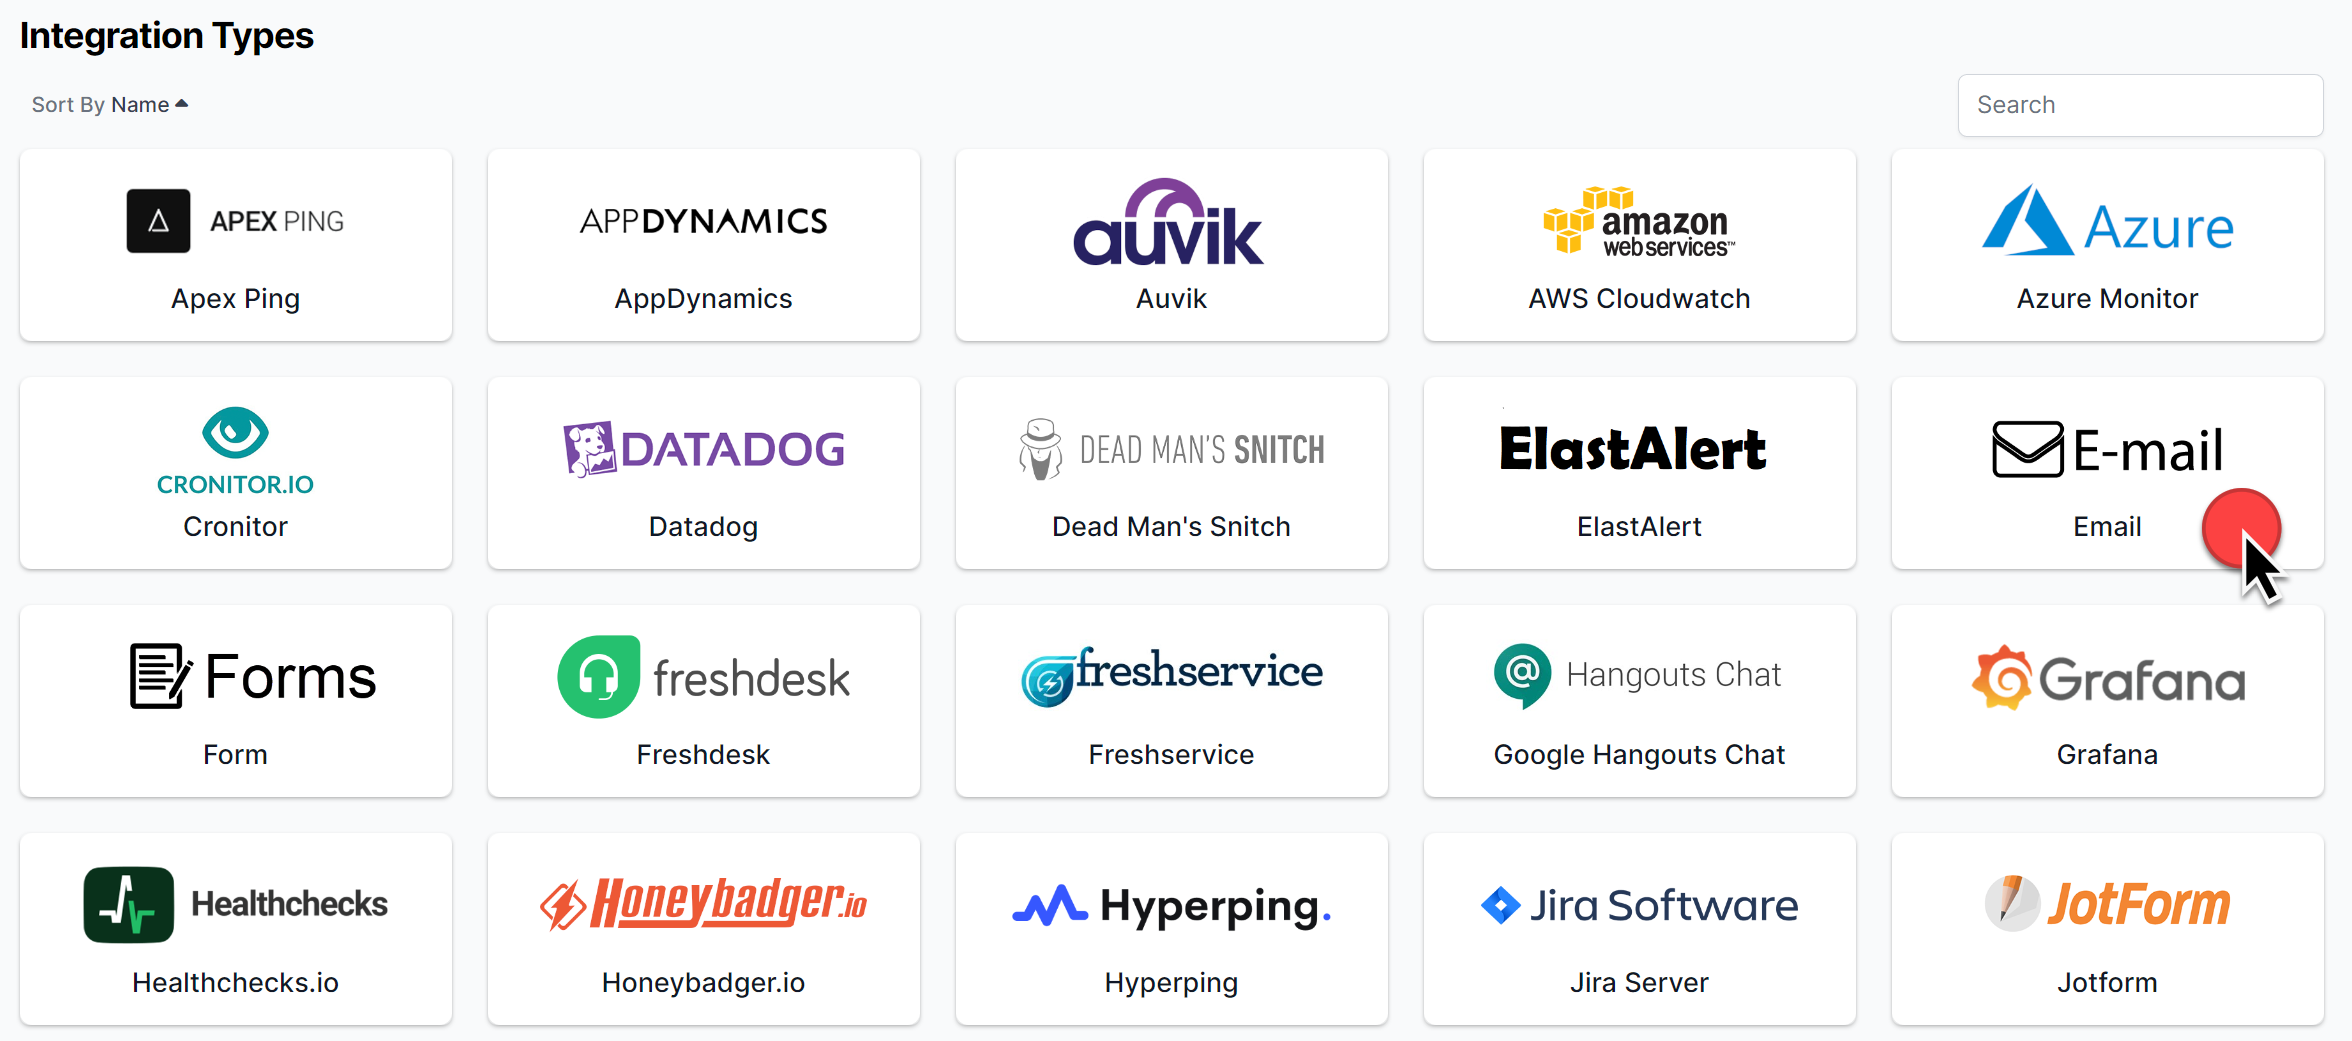
Tool Integration Icons
- On the new integration form, Click the Integration Guide Documentation Link.
- Follow the integration guide.

Integration Guide
Generic Integration
Can't find your integration? That's ok, there are two great generic options:
- Email Integration—The email integration is the most generic integration as most tools support sending emails for alerts and alarms.
- Webhook Integration - The webhook integration is also very flexible, with most tools supporting sending webhooks. Your tool will need to be able to use a custom format so PagerTree can understand the data being sent.
Teams
Teams represent actual teams within your organization. They logically group together:
Scheduling
Oncall schedules are composed of calendar events. Each calendar event is associated with one or more users and one or more escalation layers. Team admins are responsible for maintaining on-call calendars in PagerTree, but account admins can also maintain calendars.
Create a Single-Day Event
- Navigate to your team page.
- Double-click a day on the calendar to create a new event.
- Follow the instructions on the "New Event" form.
- Assign user(s) to the event (required).
- Select a start date and end date.
- Assign a layer for the user(s).
- Click Create.
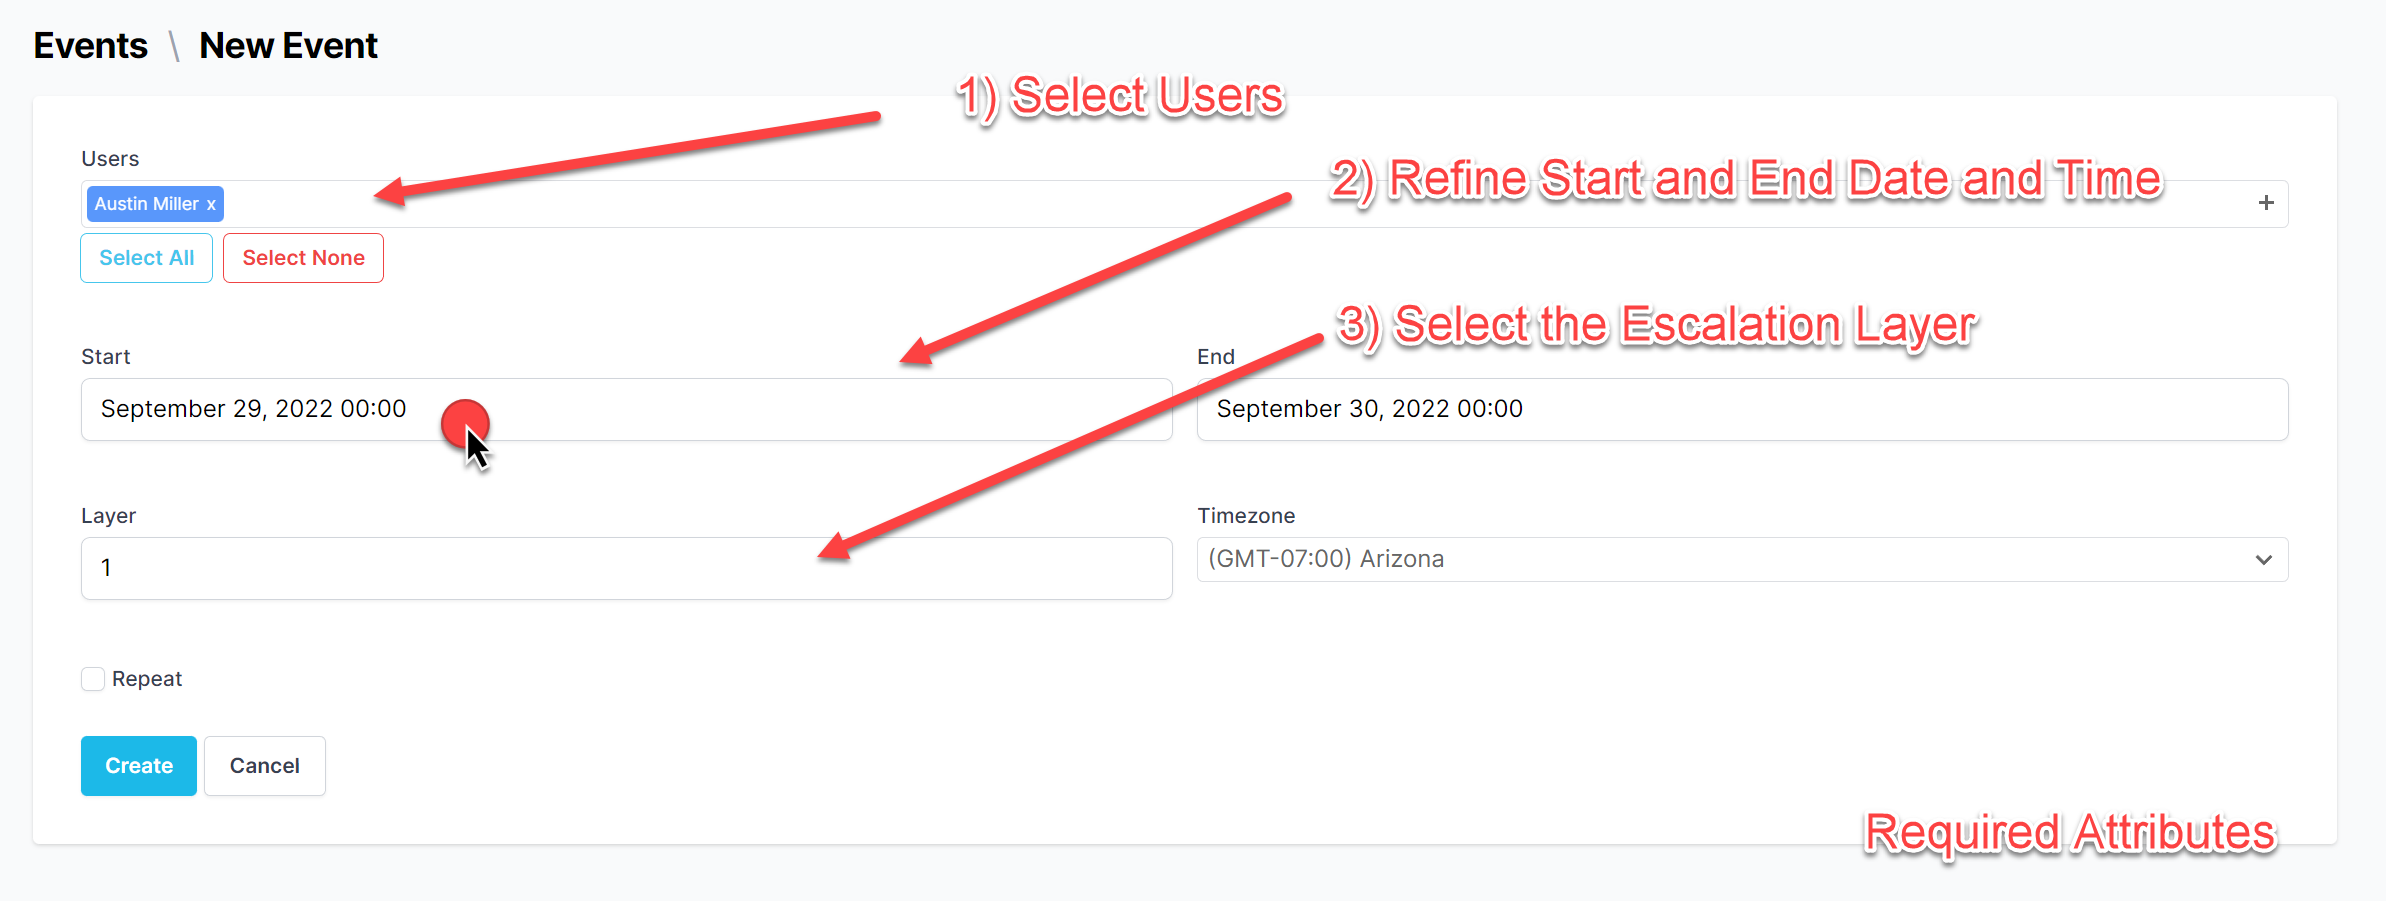
Annotated New Event
Create a Multi-Day Event
- Navigate to your team page.
- Click and drag the calendar (in the white space) to create a multi-day event.
- Follow the instructions on the "New Event" form.
- Assign user(s) to the event (required).
- Select a start date and end date.
- Assign a layer for the user(s).
- Click Create.
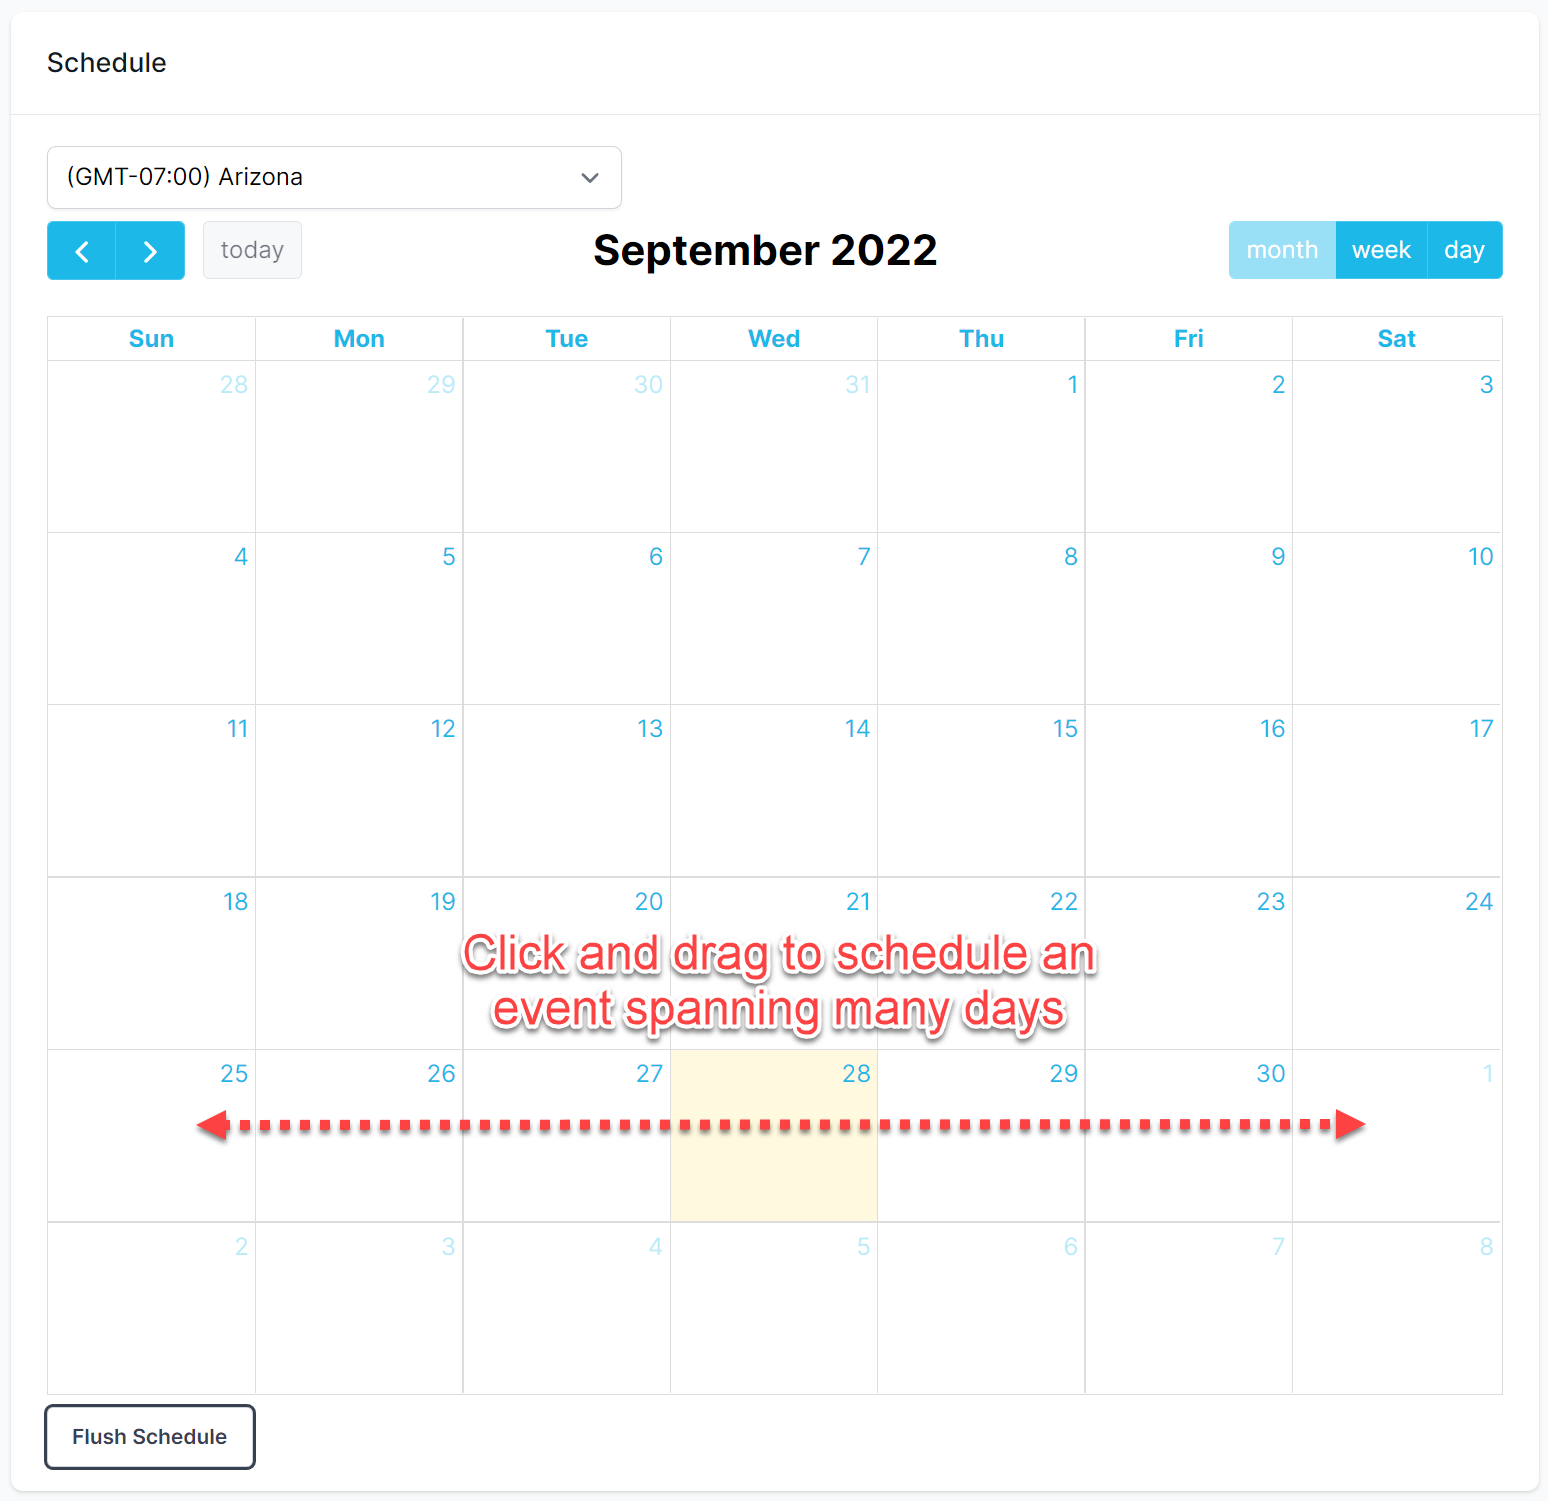
Multi-Day Event
Event Override
To override an event for a duration of time:
- Single-click the Event to show the event details.
- Click the Event Override Button.
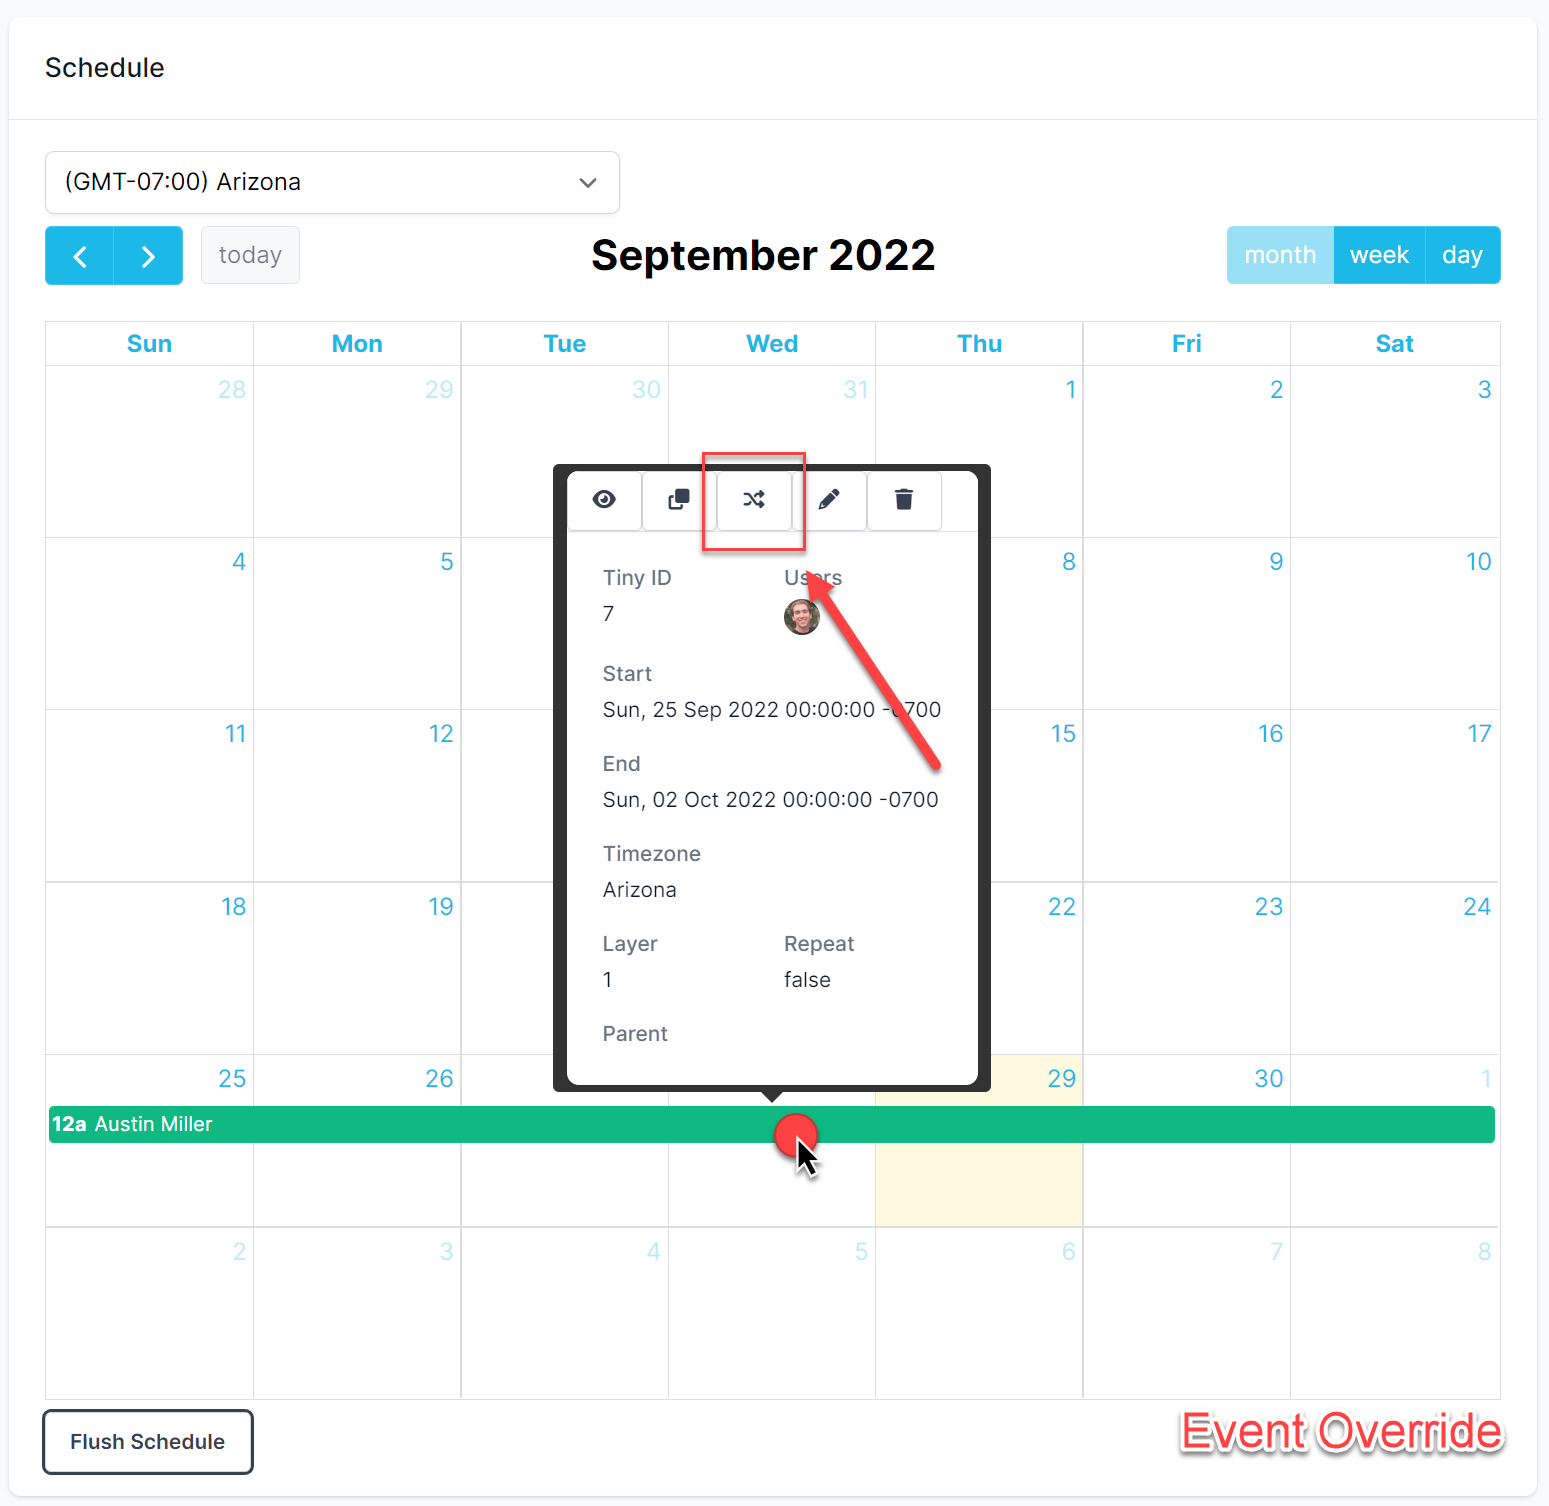
Event Override Button
- On the event override form:
- Select the user that will be overriding.
- Scope the dates and times of when the user will be overriding.
- Click the Create Button.
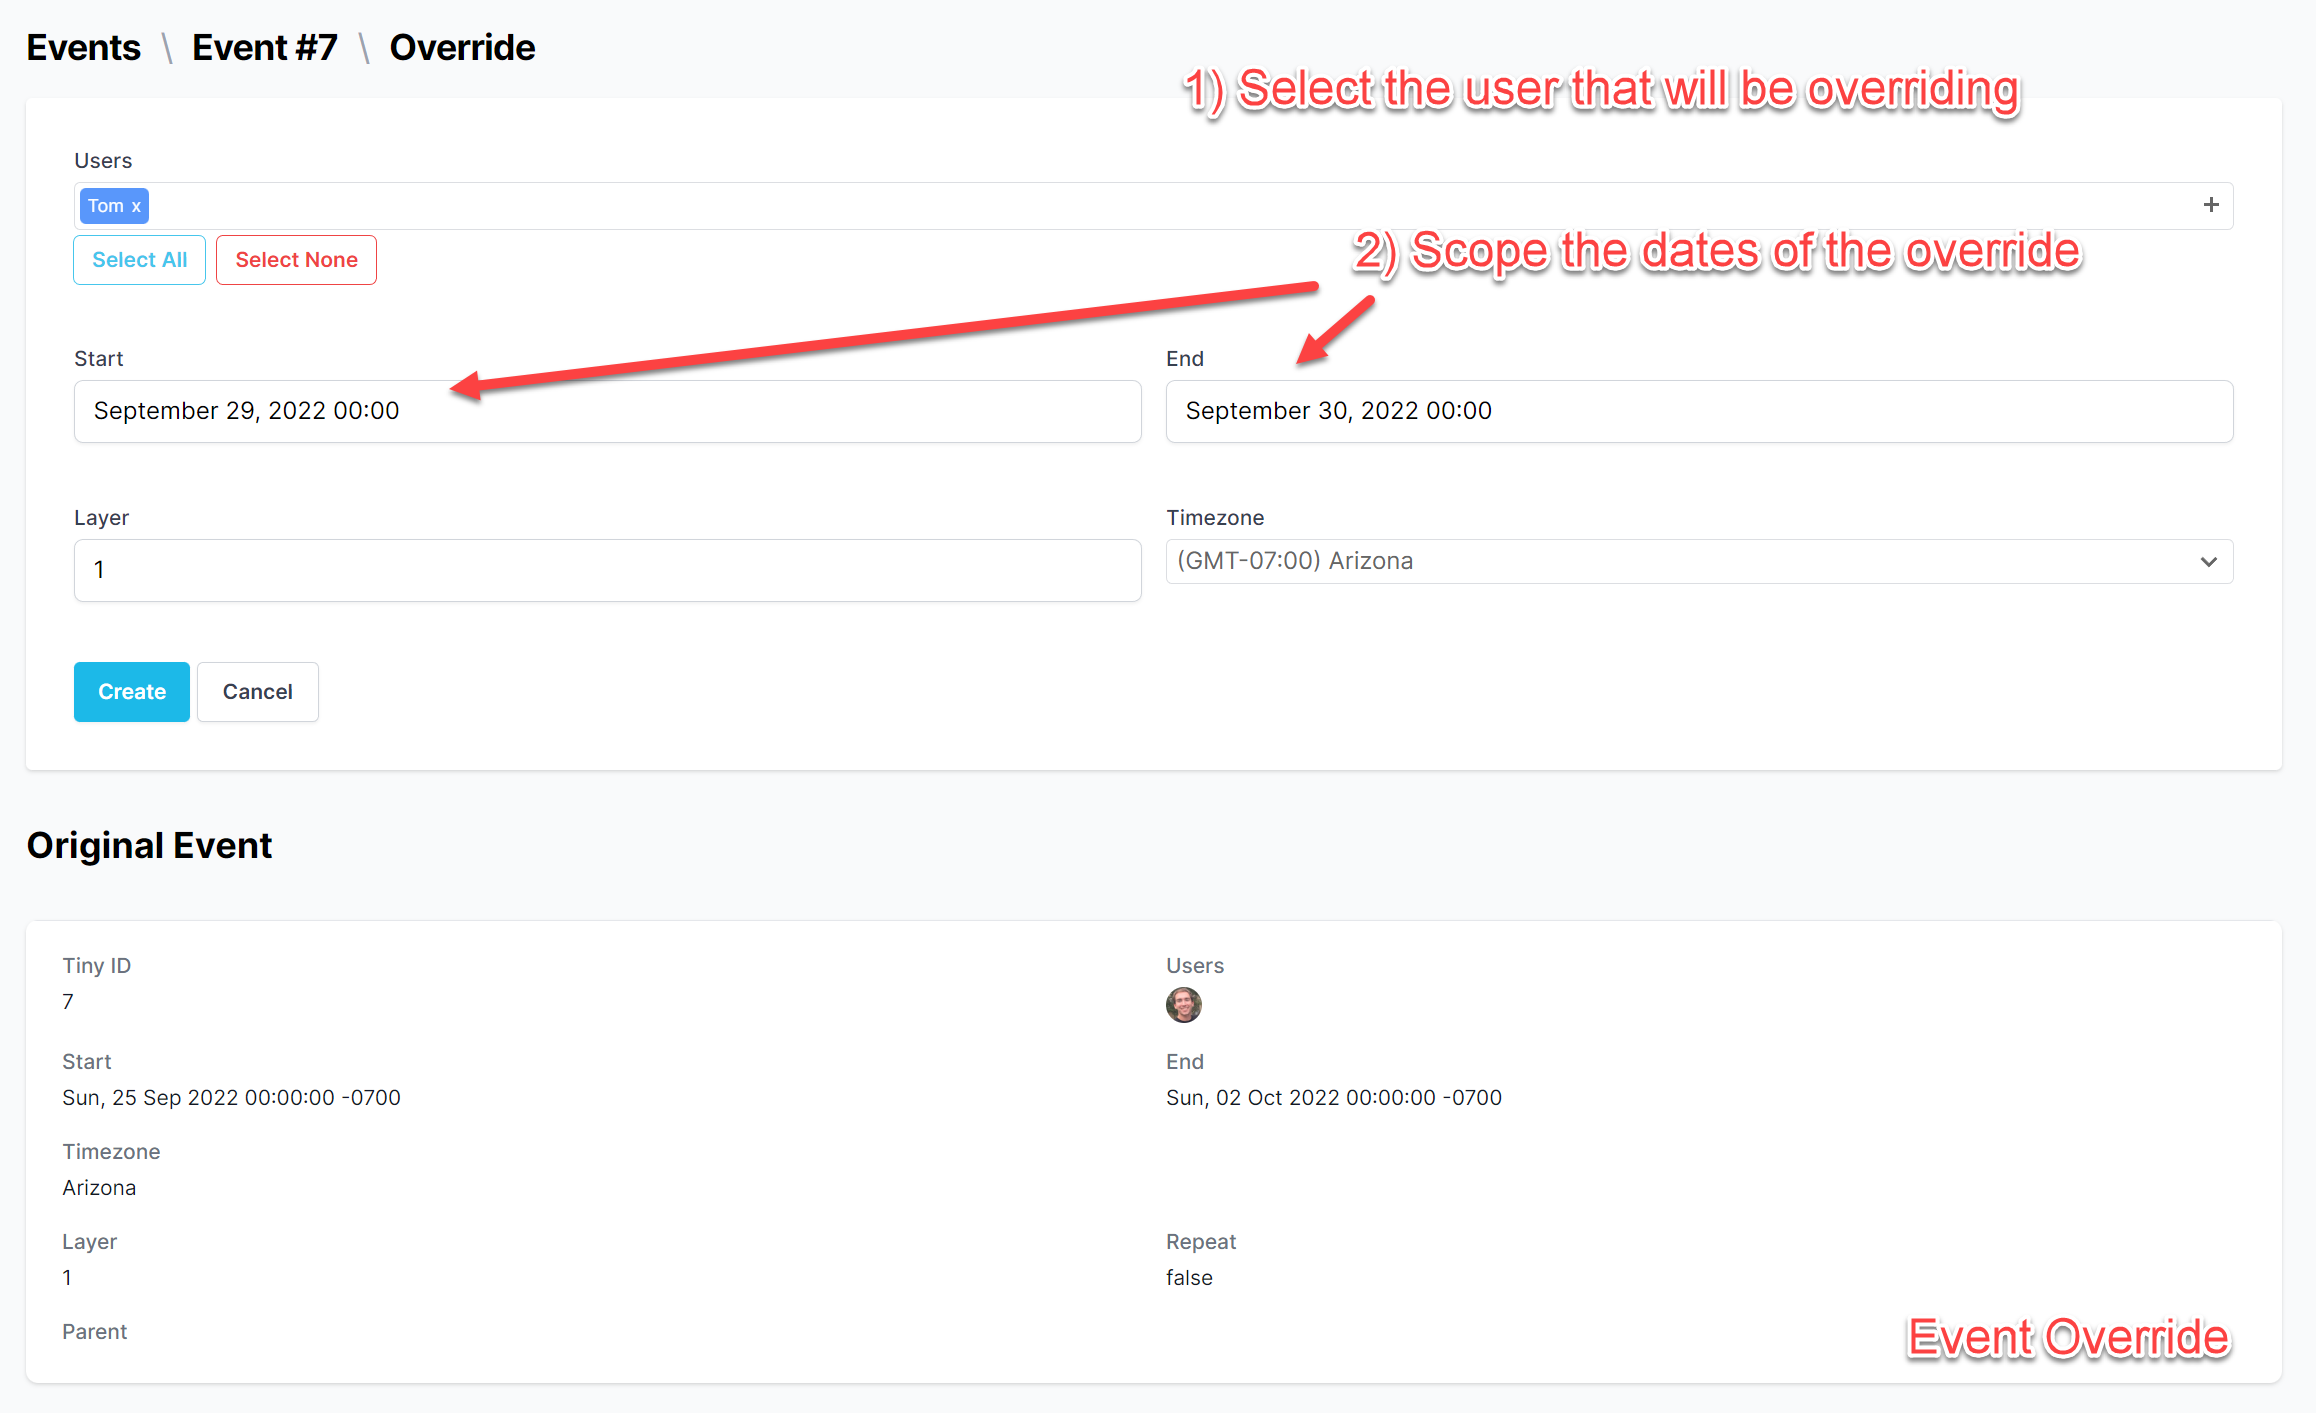
Annotated Override Form
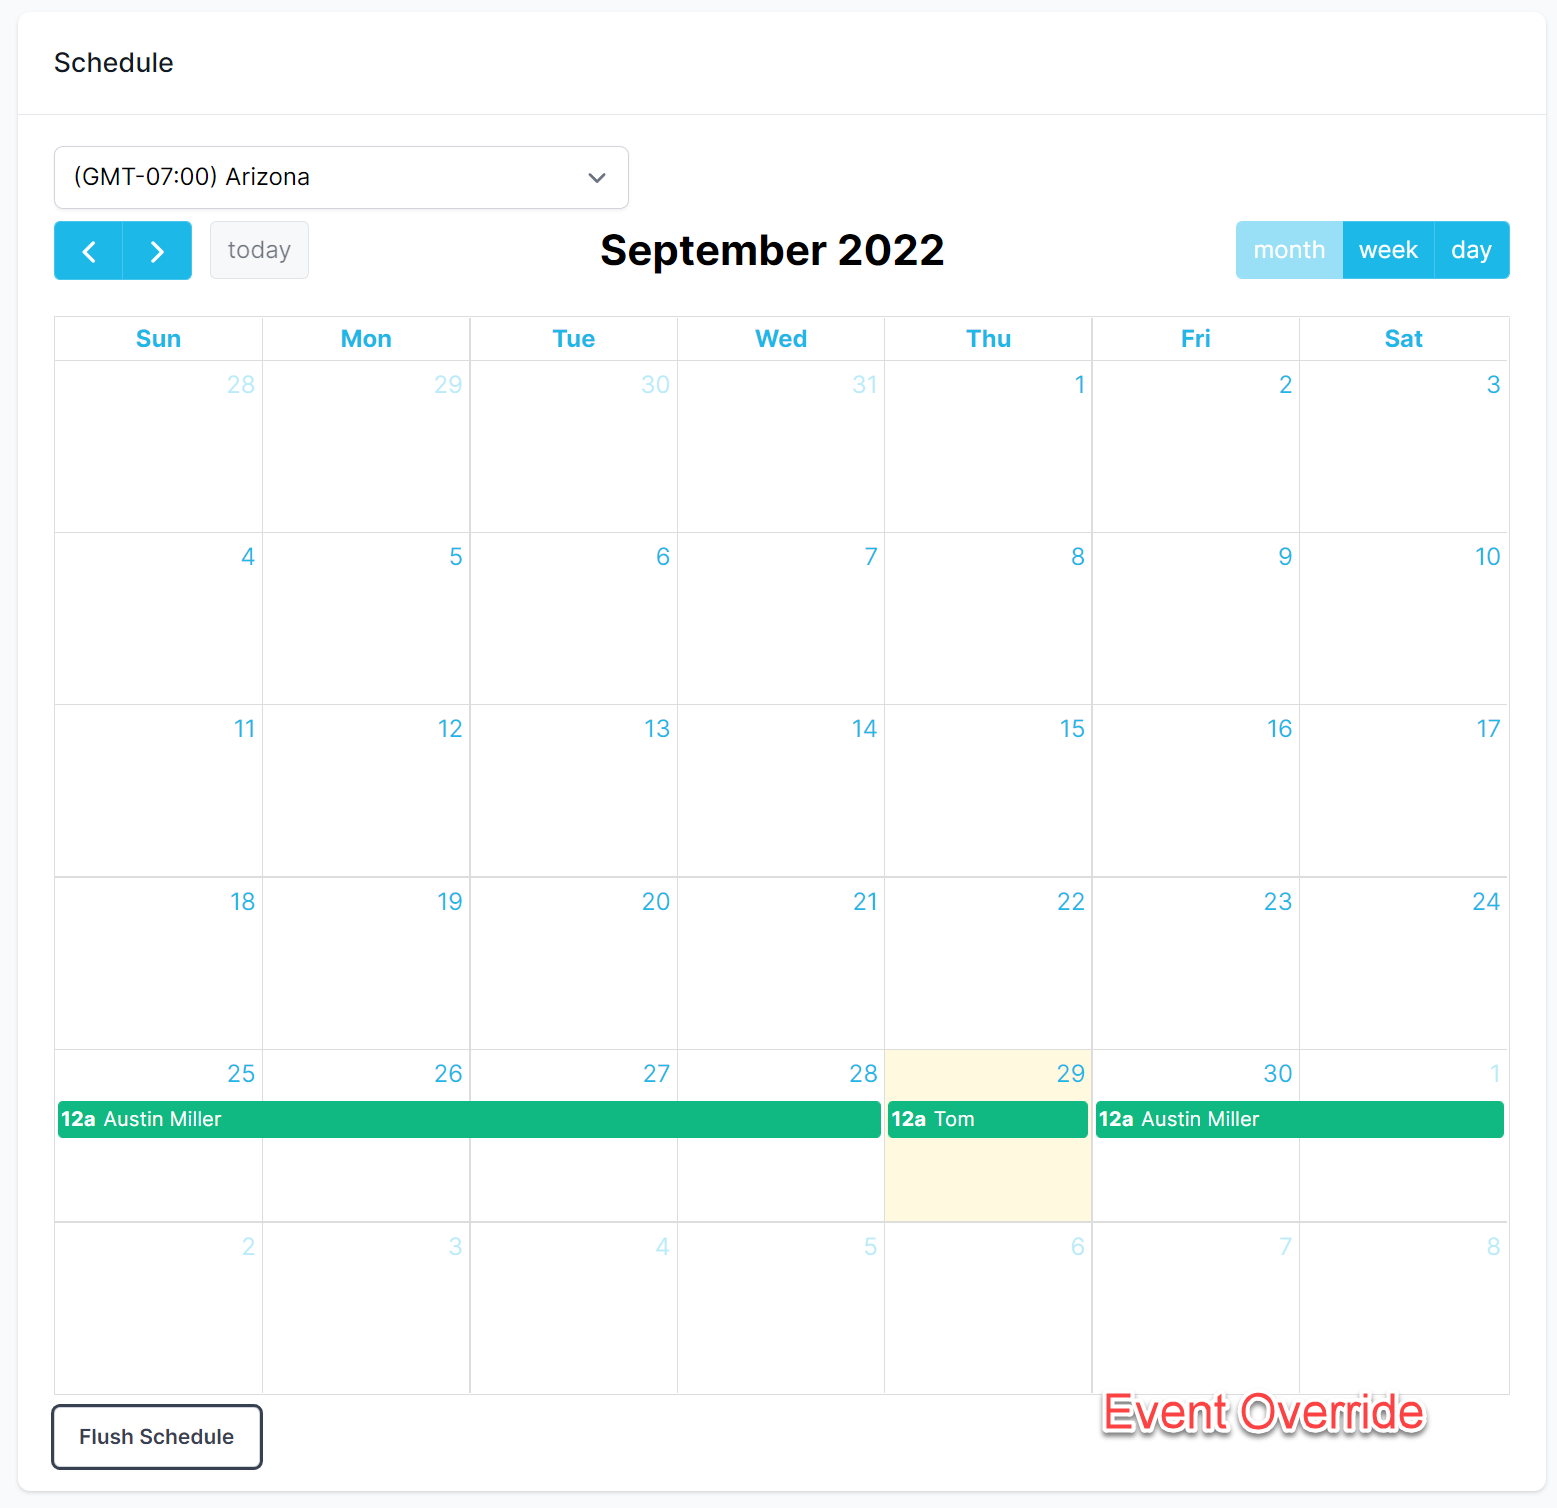
Overridden Event
Notifications
- Notifications represent a message sent to an account user via a channel (push, email, sms, voice or Slack).
- Notifications are generated by alerts, broadcasts, and the PagerTree system.
- Notifications cannot be manually created.
Default Notification Channels
Users can elect from the following default notification channels in their personal account settings:
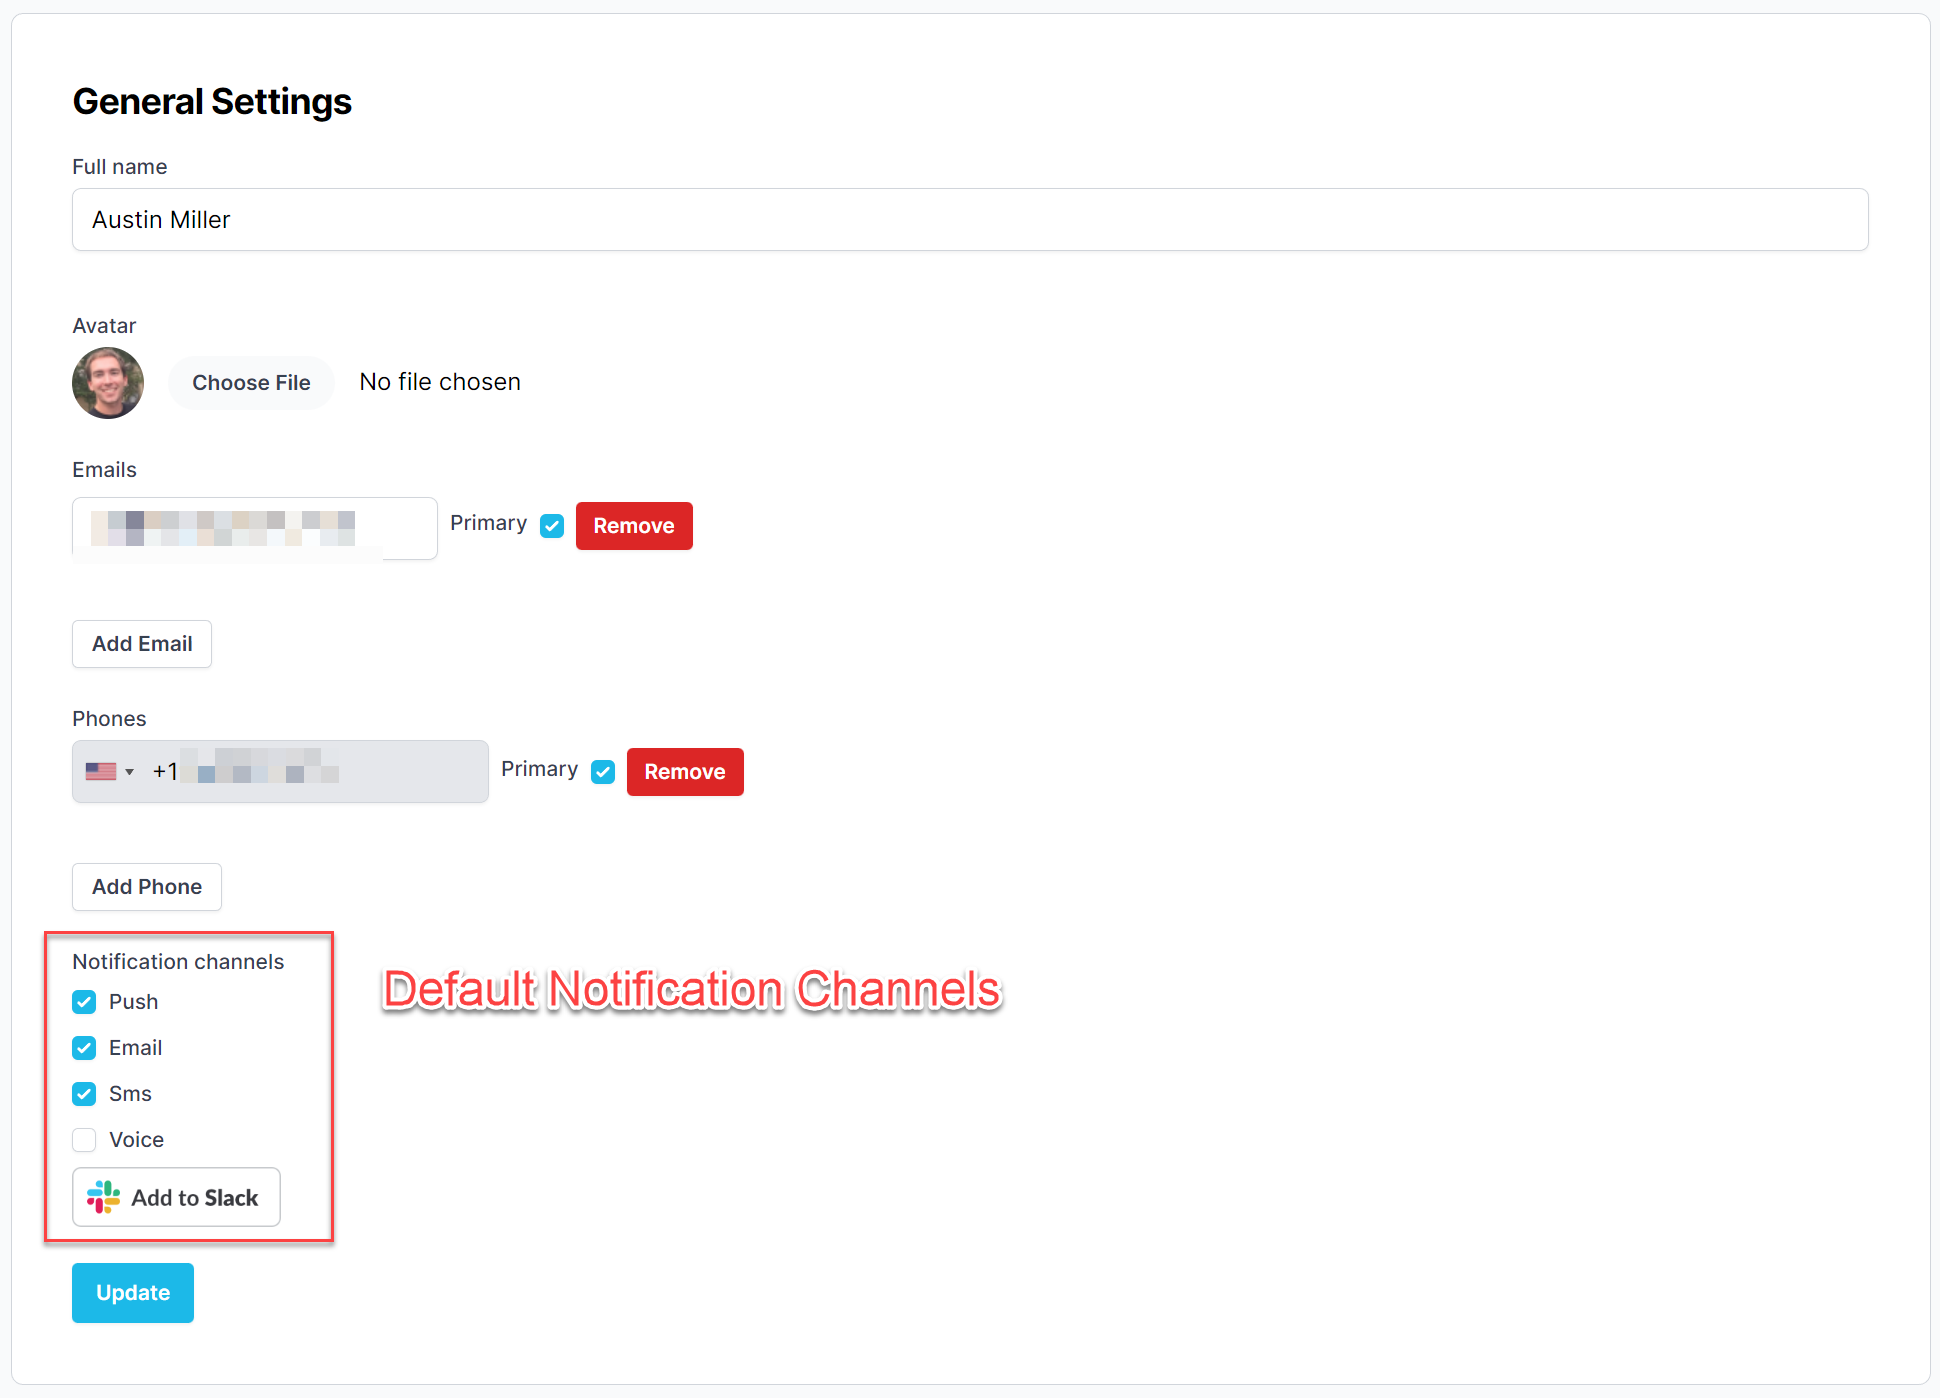
Default Notification Channels
Do Not Disturb Bypass
Users can bypass their Apple and Android devices' DND to receive push, SMS, and voice notifications while their phones are in DND mode.
Instructions for both can be found in the Notifications documentation.
Notification Persistence (Push)
When a user has persistent notifications, push notifications will be sent every 90 seconds up to 1 hour.
- Navigate to the My Settings Page.
- Scroll to the Other Settings section.
- Select the Alert Urgency that should have persistent notifications.
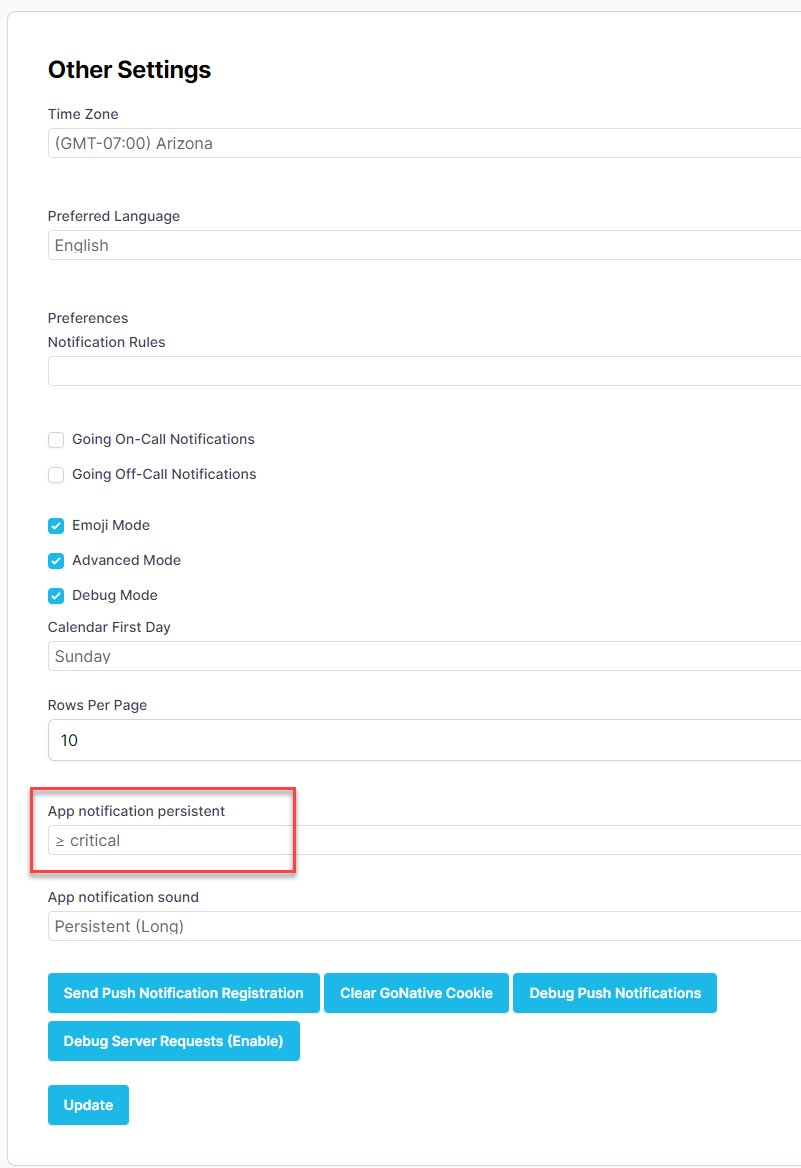
Notification Persistence
- Click Update.
Advanced Features
By default, PagerTree hides many of the more "advanced" functionalities. To view advanced objects, you must enable advanced mode.
- Navigate to the My Settings Page.
- Scroll to the Other Settings section.
- Check the Advanced Mode checkbox.
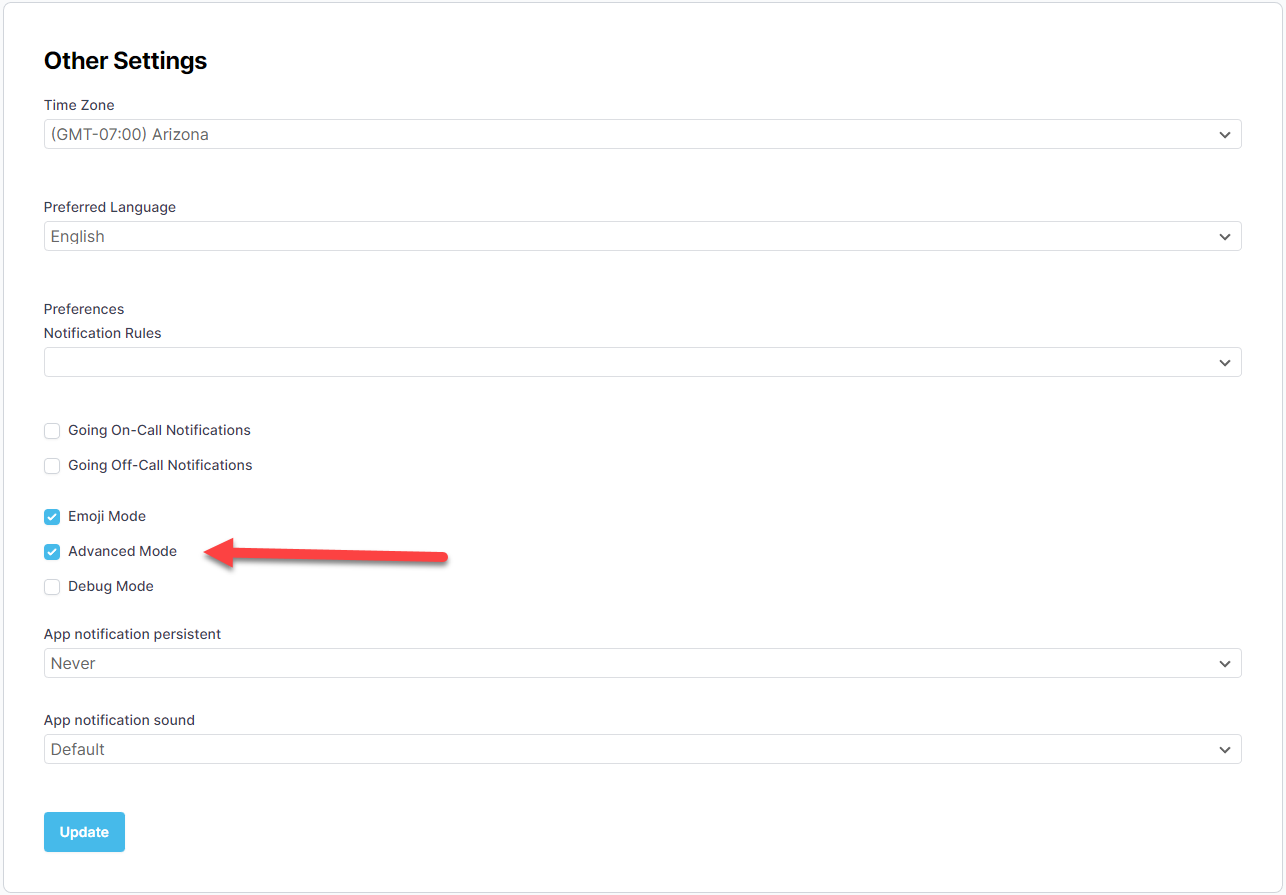
Advanced Mode Checkbox
- Click Update.
You should now see the advanced options in the navigation menu.
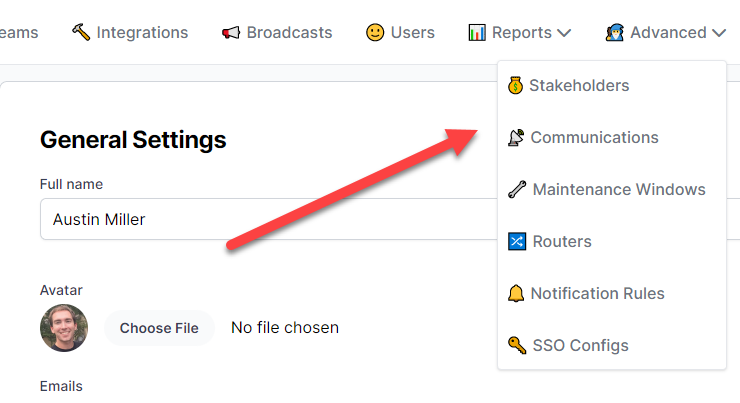
Advanced Mode Dropdown
Routers
With routers, you can perform complex matching and actions on alerts. Routers consist of many router rules that are processed after the integration has transformed the 3rd party data into an alert, but before the alert has been assigned to the team.
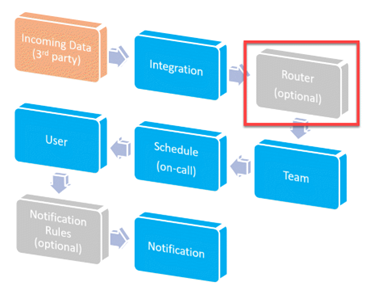
Work Flow (Routers)
Routers can route, suppress, and aggregate alerts based on matching conditions. Matching conditions include, but are not limited to:
- Regular Expression Matching
- Logic matching (ex: “value > threshold”)
- Time of Day matching
You can see the full documentation here.
Notification Rules
With notification rules, you can perform custom notification sequences. Notification rules are processed after PagerTree has selected the account user to notify but before default notification channels are used.
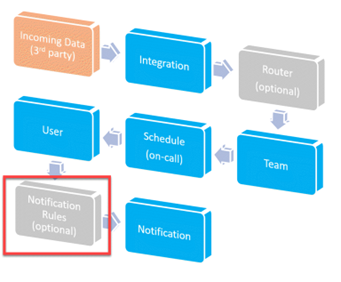
Alert Workflow (Notification Rules)
Notification rules are useful for defining custom notification sequences for different types of alerts. (For example, if the alert urgency is critical, notify me via voice every minute. If the urgency is low and it is the weekend, suppress the notification.)
Notification Rules are specific to a user's preference but can be re-used by all account users in your account.
You can find the full documentation for notification rules here.
When to use Routers vs Notification Rules?
Routers would be used if you would like to route an alert to your after-hours team when it comes in during non-business hours.
Notification rules would be used if you had a specific cycle you would like to be contacted in, i.e., call the primary phone first, call the secondary, then send an SMS, and repeat.
SSO
PagerTree offers several providers for single sign-on (SSO), and uses the SAML 2.0 protocol. SAML is an XML standard for exchanging authentication data between parties. Account admins must enable advanced mode to see the SSO Configs option in the advanced feature dropdown.
- SSO Bypass - For security purposes, account admins can bypass SSO. If needed, they can log into their PagerTree account via username and password instead of through SSO.
- Authorized Users- Users will only be able to sign into a PagerTree account through SSO if they have been given access to PagerTree through your SSO IDP.
- User Provisioning and Deprovisioning- User accounts are not automatically provisioned or de-provisioned. They are only provisioned upon their first login and must be manually deleted in the user dashboard by an account admin.
You have now completed the PagerTree account admin quick start guide. For additional learning topics and more advanced user guides, you can visit https://pagertree.com/docs.