✨ Jekyll site to AWS S3 using GitHub Actions

In this tutorial, I will show you how to build and deploy a Jekyll static site to AWS S3 + Cloudfront using GitHub Actions. At PagerTree we use GitHub Actions to automate the building and deploying of our marketing site pagertree.com.
What are GitHub Actions?
These days, if you have to do anything manually more than a couple of times, you should probably be automating it. GitHub Actions make it easy to automate software workflows. At PagerTree, we use GitHub Actions to deploy our marketing site in a continuous and reliable way.
Tutorial
For this tutorial, I’ll make the assumption that you are fairly familiar with git and Jekyll and already have a static website hosted on AWS S3 + Cloudfront website setup.
What You’ll Need
Below I’ve listed what you’ll need for this tutorial. I’ll assume you are dangerous enough to create the following on your own and won’t cover how to create these, as it’s out of the scope of this post.
- Jekyll static site
- GitHub Account and Repo
- AWS
Desired Workflow
Our desired workflow should look something like the following:
On push to our repo’s main branch or when manually clicked in GitHub:
- Build the main branch.
- Deploy the generated static site files to AWS S3.
- Create an AWS Cloudfront invalidation.
This is pretty minimal, and you can get waaay fancier, but for the purpose of this tutorial it should help us understand how to use GitHub Actions.
Add a GitHub Action Workflow
Your GitHub Actions definitions live in a special directory in your repo (<repo>/.github/workflows/). Inside this directory, you’ll have all your workflow files (yml format).
Workflows will trigger off events (aka specific activities) that happen in GitHub. There’s quite a few, but for this tutorial we will focus on the push and workflow_dispatch events.
Build and Deploy on Push into Main
In your <repo>/.github/workflows/ directory, create a new file called build_and_deploy.yml. Copy and paste the following into your newly created GitHub Action workflow:
name: CI / CD

# Controls when the action will run.
on:
  # Triggers the workflow on push for the main branch
  push:
    branches: [ main ]

  # Allows you to run this workflow manually from the Actions tab
  workflow_dispatch:

env:
  AWS_ACCESS_KEY_ID: ${{ secrets.AWS_ACCESS_KEY_ID }}
  AWS_SECRET_ACCESS_KEY: ${{ secrets.AWS_SECRET_ACCESS_KEY }}
  AWS_DEFAULT_REGION: 'us-west-2'

# A workflow run is made up of one or more jobs that can run sequentially or in parallel
jobs:
  build:
    runs-on: ubuntu-latest
    steps:
    - uses: actions/checkout@v2
    - name: Set up Ruby
      uses: ruby/setup-ruby@v1
      with:
        ruby-version: "3.0" # Not needed with a .ruby-version file
        bundler-cache: true
    - name: "Build Site"
      run: bundle exec jekyll build
      env:
        JEKYLL_ENV: production
    - name: "Deploy to AWS S3"
      run: aws s3 sync ./_site/ s3://${{ secrets.AWS_S3_BUCKET_NAME }} --acl public-read --delete --cache-control max-age=604800
    - name: "Create AWS Cloudfront Invalidation"
      run: aws cloudfront create-invalidation --distribution-id ${{ secrets.AWS_CLOUDFRONT_DISTRIBUTION_ID }} --paths "/*"
This workflow file is responsible for building and deploying the site. We’ve named it “CI / CD”. It’s pretty self explanatory, but I’ll explain the process:
- When a push is made into the main branch (or manual button click in GitHub), run this workflow.
- The job - Use the Ubuntu latest virtual environment (see all environment options here)
- Checkout our main branch.
- Setup our Ruby environment (see docs) - Installs Ruby (with specified Ruby version if you have a .ruby-version file) and runs ‘bundle install’.
- Build the site (with the production environment).
- Uploads output files from our
_sitedirectory to our S3 bucket. - Creates a Cloudfront invalidation (so we can see our new site immediately).
Pretty straight forward, but we still need to create a few resources in AWS and configure secrets in our GitHub repository.
Create necessary AWS resources
We’ll need to create 2 AWS resources, namely an IAM Policy and User.
- IAM Policy - will grant restricted access to deploy to our S3 bucket and create an invalidation on our Cloudfront distribution. You’ll attach this policy to the IAM User.
- IAM User - will be the credentials the GitHub Action uses to run its aws-cli commands.
Below is the AWS IAM Policy you’ll need to create. You must modify it by replacing a couple of the items below (make sure to replace the < and > too).
<your-bucket-name>- Your S3 bucket name (ex: www.acme.com)<your-aws-account-number>- The 12 numeric characters of your AWS account.<your-distribution-id>- The alpha numeric 14 characters of your associated Cloudfront distribution
- In AWS, create a new IAM Policy
{
    "Version": "2012-10-17",
    "Statement": [
        {
            "Resource": [
                "arn:aws:s3:::<your-bucket-name>",
                "arn:aws:s3:::<your-bucket-name>/*"
            ],
            "Sid": "VisualEditor1",
            "Effect": "Allow",
            "Action": [
                "s3:*"
            ]
        },
        {
            "Sid": "VisualEditor2",
            "Effect": "Allow",
            "Action": "cloudfront:*",
            "Resource": "arn:aws:cloudfront::<your-aws-account-number>:distribution/<your-distribution-id>"
        }
    ]
}
- Create a new IAM User with programmatic access and attach the IAM Policy you just created above.
- Copy the
AWS access key IDandSecret access keyto somewhere safe, as we will need these in our next step
Configure The GitHub Action Secrets
In order to use the special variables like ${{ secrets.AWS_ACCESS_KEY_ID }} we’ll need to configure them in the GitHub Actions Secrets. To do this:
- In GitHub, navigate to Your Repo > Settings > Secrets > Actions
- For each secret below, click the New repository secret button, fill out the form, and click Add Secret
AWS_ACCESS_KEY_ID- What you copied in the previous step asAWS access key ID.AWS_SECRET_ACCESS_KEY- What you copied in the previous step asSecret access key.AWS_S3_BUCKET_NAME- The bucket name you set previously in your IAM Policy (ex: www.acme.com).AWS_CLOUDFRONT_DISTRIBUTION_ID- The Cloudfront distribution id you set previously in your IAM Policy.
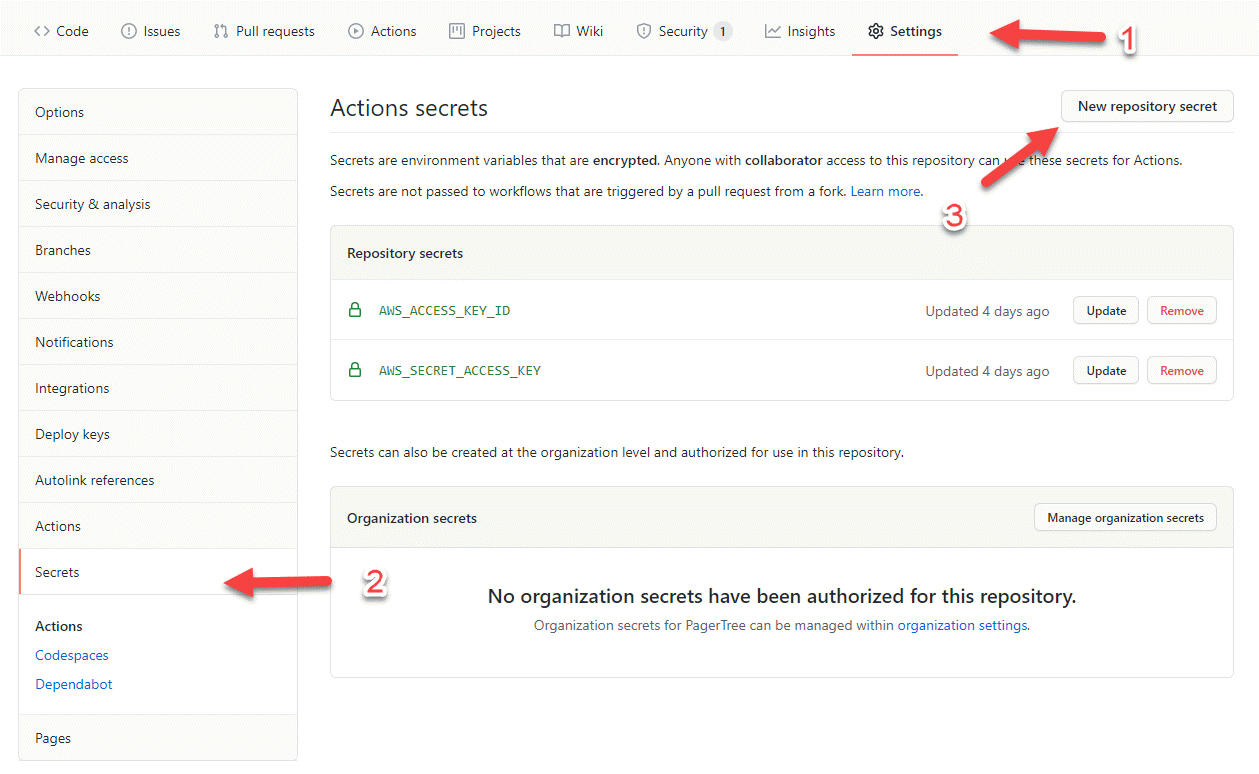
GitHub Actions Repo Settings Secrets
Testing your new GitHub Action
The easiest way to test your new GitHub action, is to:
- Make a small change to your Jekyll site
- Commit the change, and push to main.
- Navigate to your website (https://www.acme.com), do a hard refresh (Ctrl + F5) and then you should see the changes you just made.
What you should see in the GitHub Actions panel, is a workflow that was created, and the output of the commands that were run.
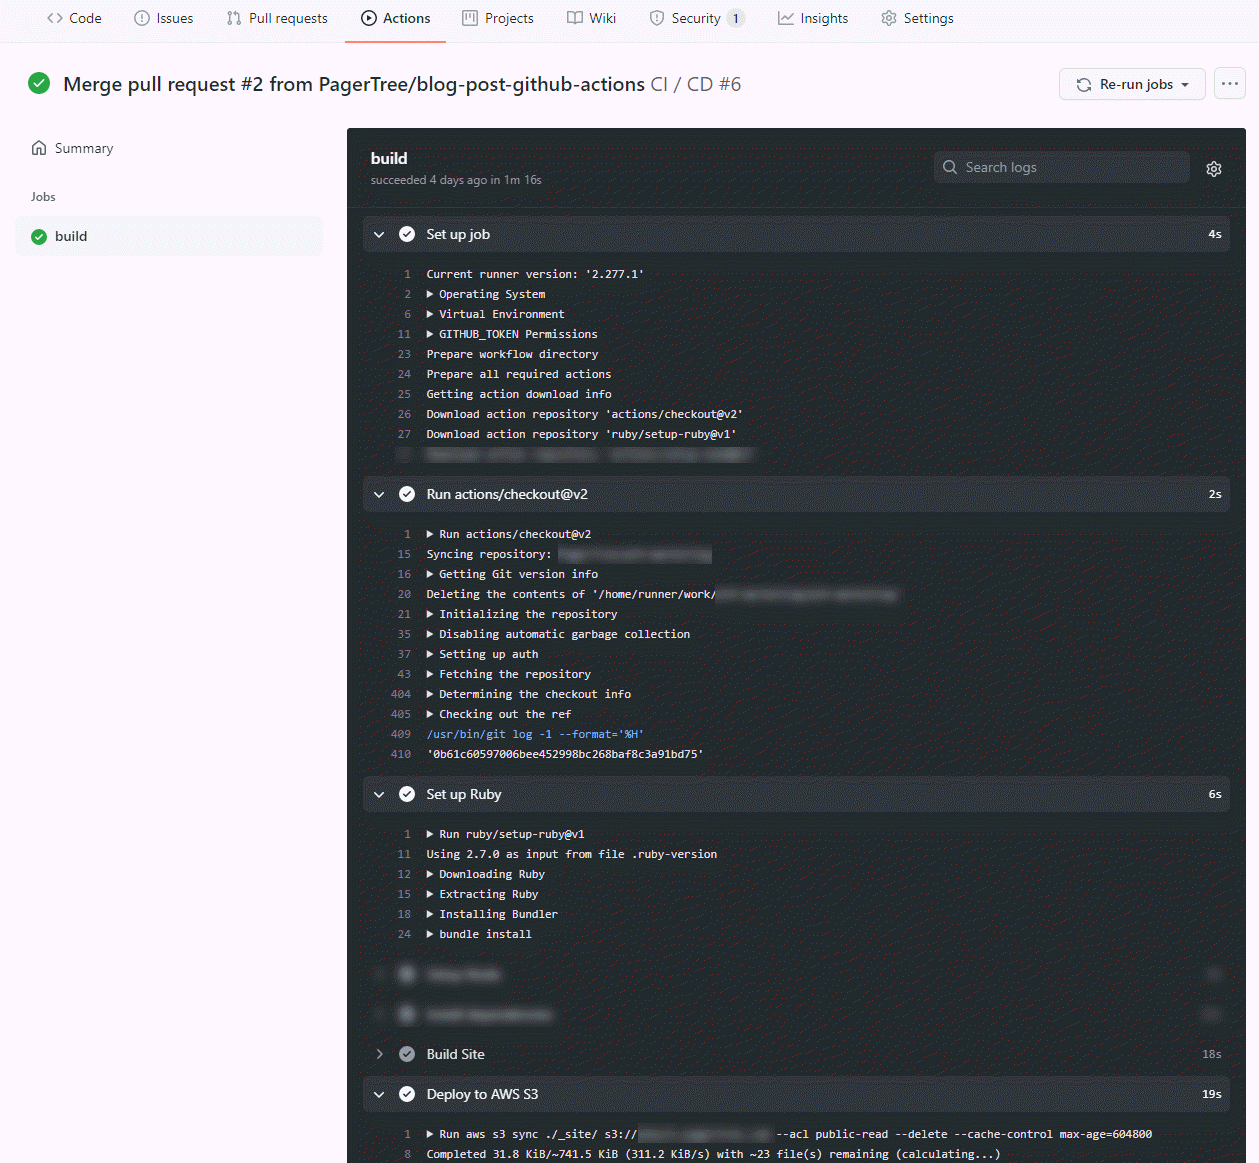
GitHub Action Run Details
Note: The first time this runs it could take ~5 minutes. The ‘bundle install’ command for our project took a while, but don’t worry, subsequent builds should use the bundle cache.
Conclusion
That’s it, you’ve now successfully created a GitHub Action to build and deploy your Jekyll static site to S3 and Cloudfront. I hope you found some value in this tutorial, it’s pretty basic, but if your new to GitHub Actions it should provide a valuable launching pad. Make sure to follow me on twitter, and if you haven’t yet, make sure to checkout PagerTree :)