Zendesk
| Company | Estimated Time | Vendor Docs | Open Source |
|---|---|---|---|
| Zendesk | 5 minutes | view | v3.rb |
What is Zendesk?
Zendesk is a cloud-based customer service software and support ticketing system.
How It Works
Zendesk creates tickets.
- When a ticket is created (
event_type == "create") in Zendesk, an alert is created in PagerTree automatically. - When a ticket is acknowledged (
event_type == "acknowledge") in Zendesk, an alert is acknowledged in PagerTree automatically. - When a ticket is resolved (
event_type == "resolve") in Zendesk, the alert is resolved in PagerTree automatically.
Integration Walkthrough
In this integration tutorial we will show you how to send tickets from Zendesk into PagerTree. The estimated time for this integration is 5 minutes. We assume that you already have a PagerTree and Zendesk account setup.
Cloning targets and/or triggers in Zendesk could lead to unexpected behavior. We recommend always creating new targets and triggers.
In PagerTree
- Create the integration by clicking the Zendesk logo.
- Copy the Endpoint URL.
In Zendesk
Create a Webhook
-
Navigate to Menu -> Admin Gear -> Go to Admin Center.
-55175a4c995985018b1423fb4e6921d7.webp)
-
In the Admin center, search "webhooks", and click the Webhooks link.

In the Admin Center, click Webhooks.
-
Click the Create webhook button.
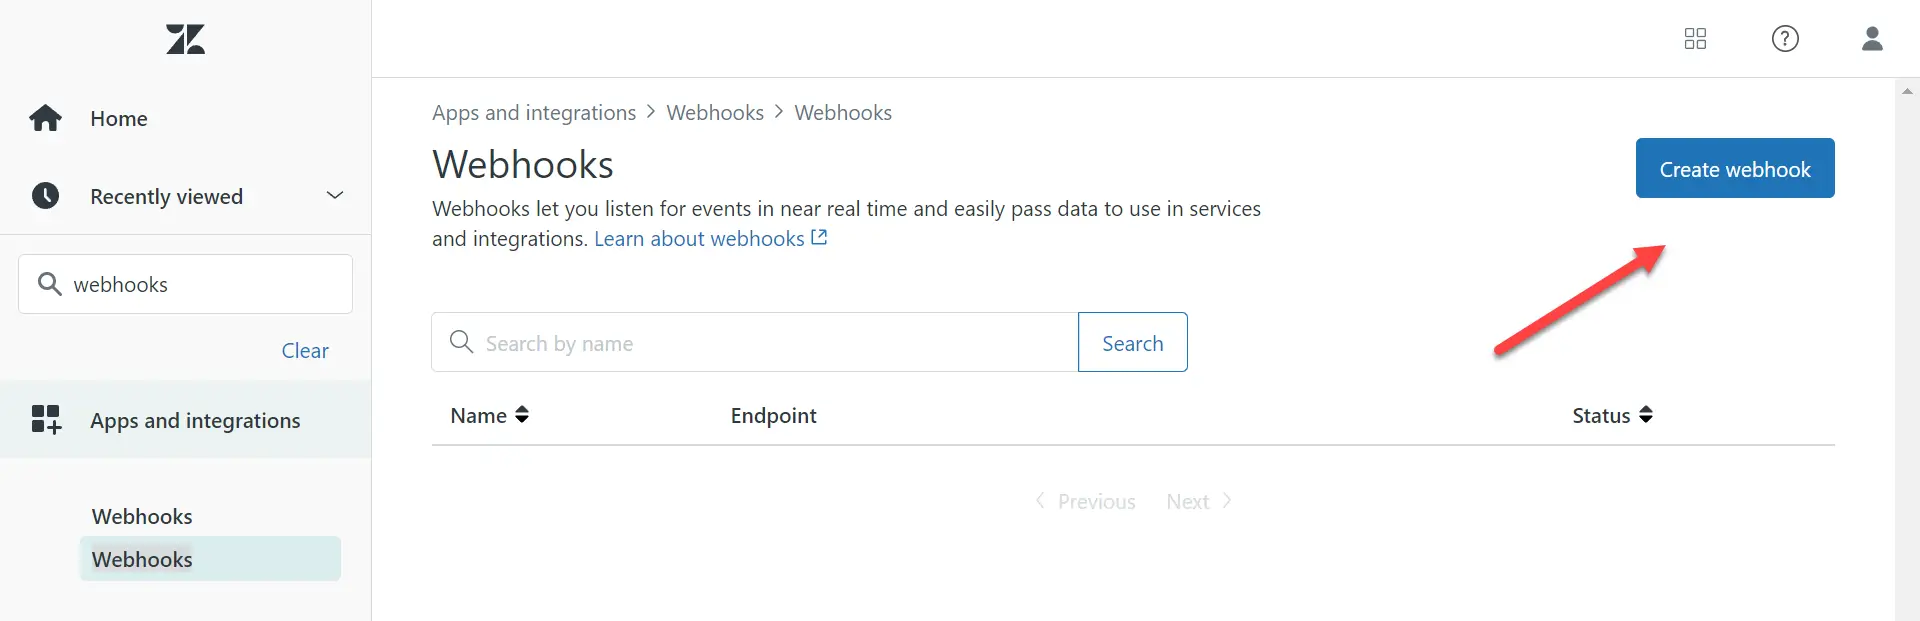
Click the create webhook button.
-
Select Trigger or automation and click Next.
 (1) (1) (3)-0582c2e8ec697ad3a7b79d395878cacf.png)
Select Trigger or automation.
-
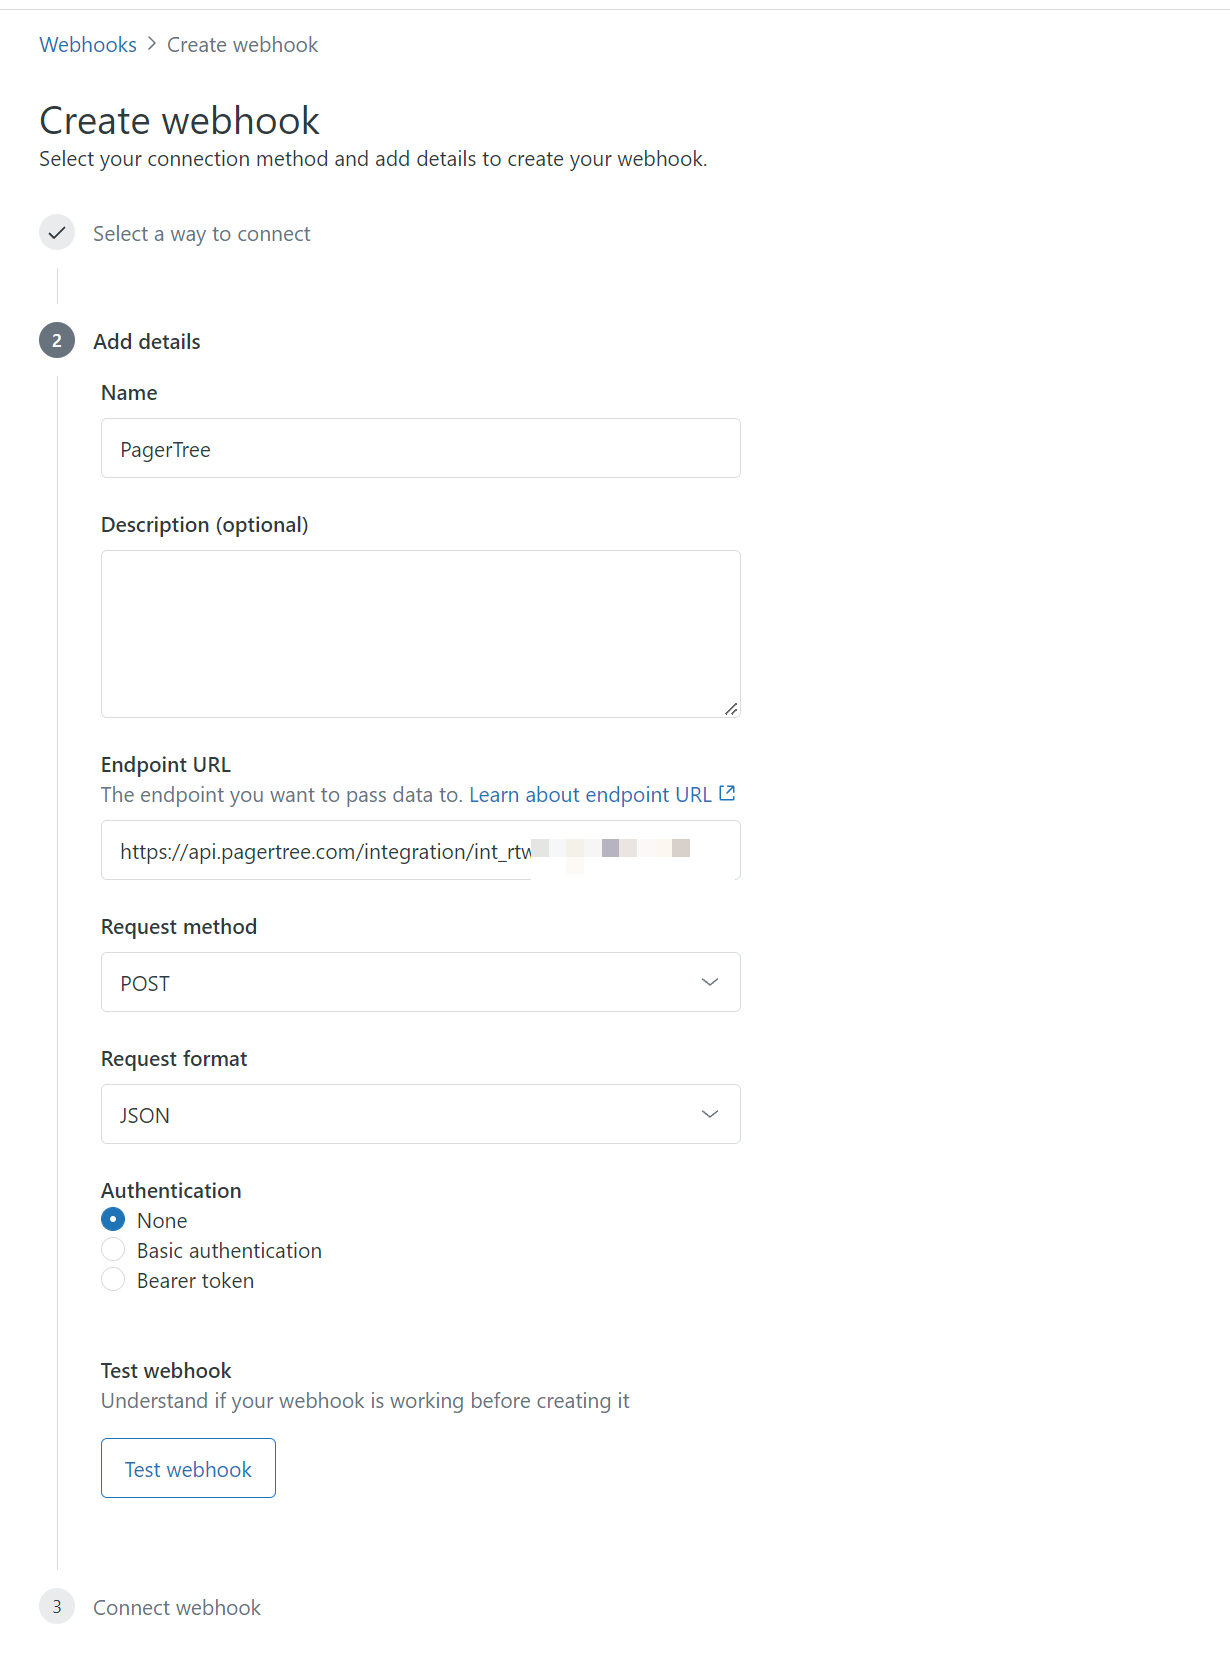
Enter in the following details:
-
Name - PagerTree
-
Endpoint Url – Paste the PagerTree Endpoint URL you copied earlier
-
Request method – Select POST
-
Request format – Select JSON
-
Authentication - None
-
Click Create webhook button.
Zendesk PagerTree Webhook
-
-
Click the Admin Center link to connect the webhook to a trigger.
Connect the Webhook in a Trigger
-
In the Business Rules -> Triggers page, click Add Trigger.
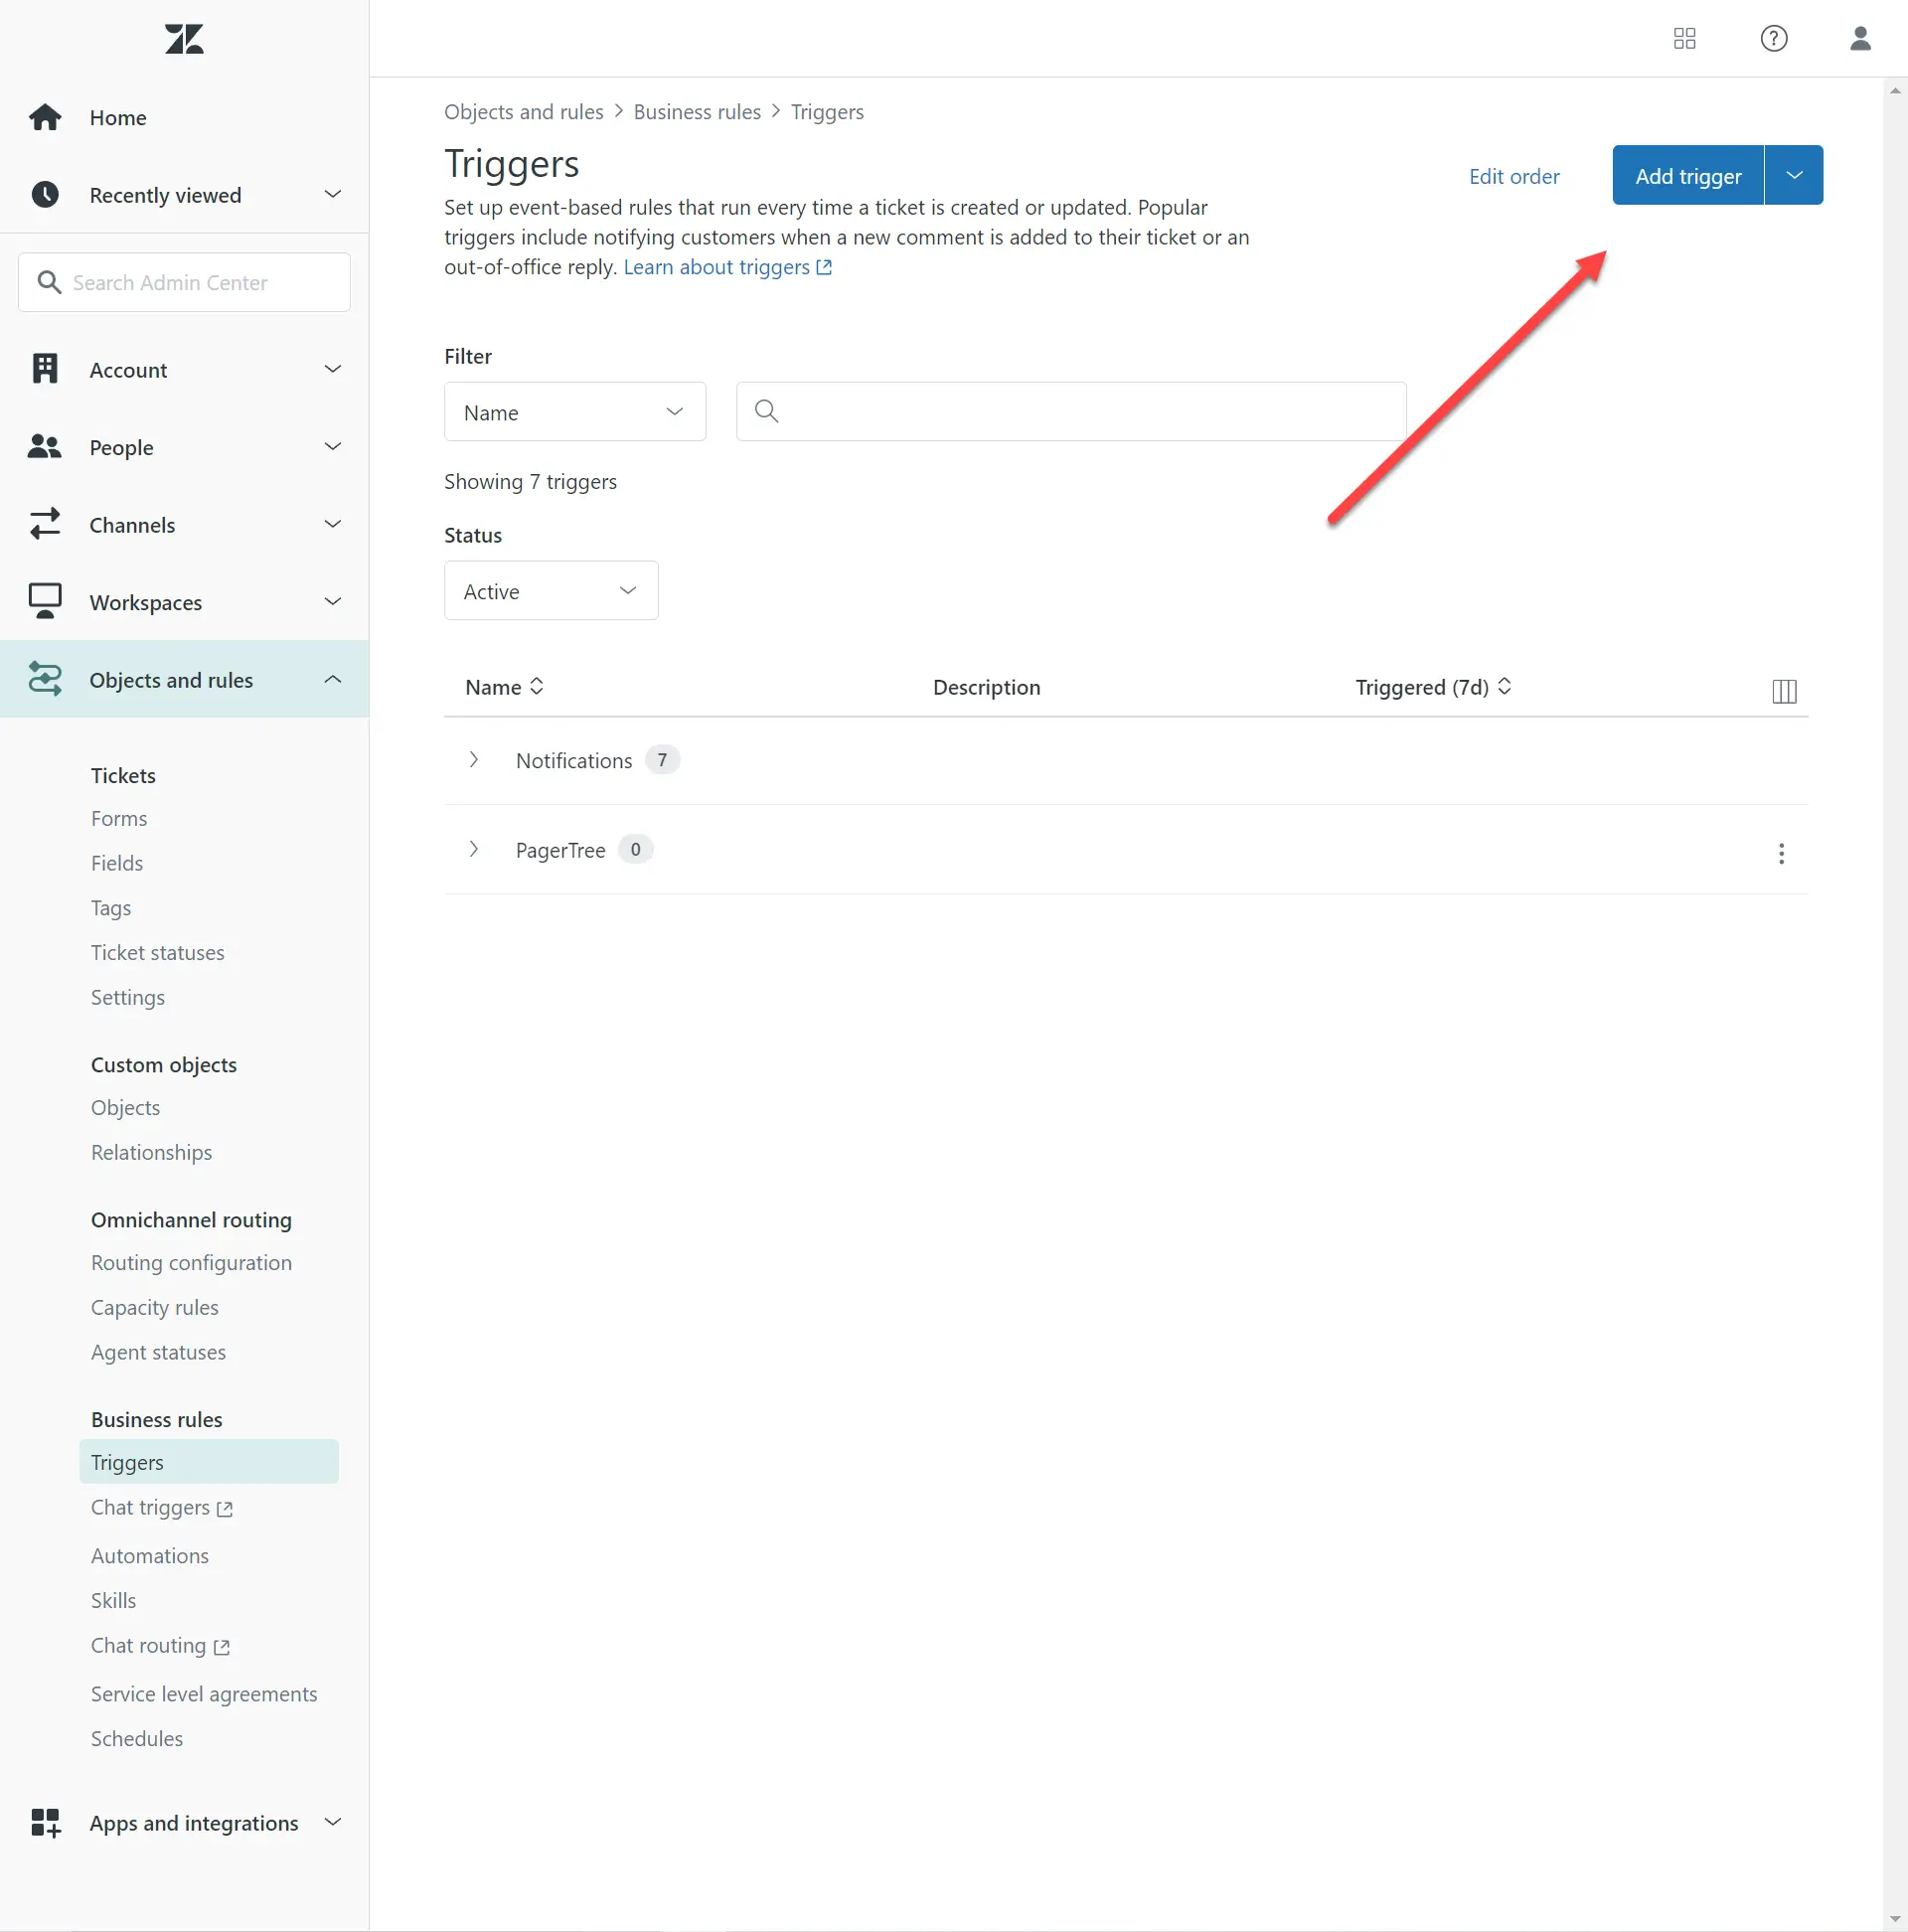
Click the Add trigger button
-
In the New Trigger form
- Trigger name – Name the target appropriately (ex: “PagerTree Create”)
- Meets any of the following conditions: Ticket is created.
- Perform these actions
- Notify active webhook: PagerTree
- Paste the following in JSON body
{
  "event_type": "create",
  "id":"{{ticket.id}}",
  "title":"{{ticket.title}}",
  "created_at_with_timestamp":"{{ticket.created_at_with_timestamp}}",
  "description":"{{ticket.description}}",
  "ticket_type":"{{ticket.ticket_type}}",
  "link":"{{ticket.link}}",
  "priority":"{{ticket.priority}}",
  "status":"{{ticket.status}}",
  "via":"{{ticket.via}}",
  "assignee_name":"{{ticket.assignee.name}}"
}
-
Click “Create” button.
-1b254eedcf9fa6f41da2e0c697f79ba9.webp)
Zendesk PagerTree Create Trigger
You have successfully completed the Zendesk Integration.
Additional Triggers
Additional triggers can be added if you would like the ability to acknowledge and resolve PagerTree alerts from Zendesk. You'll need to follow the steps again to create a trigger for your different conditions. Make sure to change the JSON payloads to the below.
Acknowledge
{
  "event_type": "acknowledge",
  "id":"{{ticket.id}}",
  "title":"{{ticket.title}}",
  "created_at_with_timestamp":"{{ticket.created_at_with_timestamp}}",
  "description":"{{ticket.description}}",
  "ticket_type":"{{ticket.ticket_type}}",
  "link":"{{ticket.link}}",
  "priority":"{{ticket.priority}}",
  "status":"{{ticket.status}}",
  "via":"{{ticket.via}}",
  "assignee_name":"{{ticket.assignee.name}}"
}
Resolve
{
  "event_type": "resolve",
  "id":"{{ticket.id}}",
  "title":"{{ticket.title}}",
  "created_at_with_timestamp":"{{ticket.created_at_with_timestamp}}",
  "description":"{{ticket.description}}",
  "ticket_type":"{{ticket.ticket_type}}",
  "link":"{{ticket.link}}",
  "priority":"{{ticket.priority}}",
  "status":"{{ticket.status}}",
  "via":"{{ticket.via}}",
  "assignee_name":"{{ticket.assignee.name}}"
}